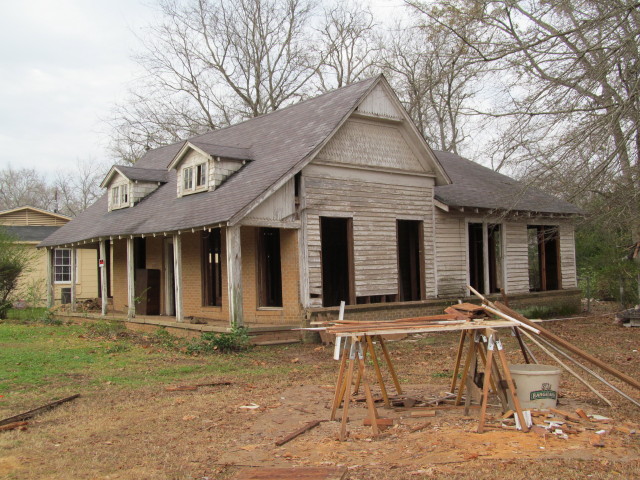
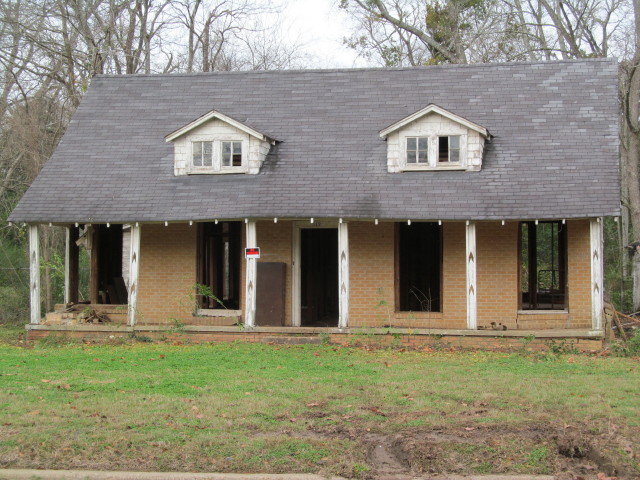
We are making very good progress with our Crockett project that we started in early January.
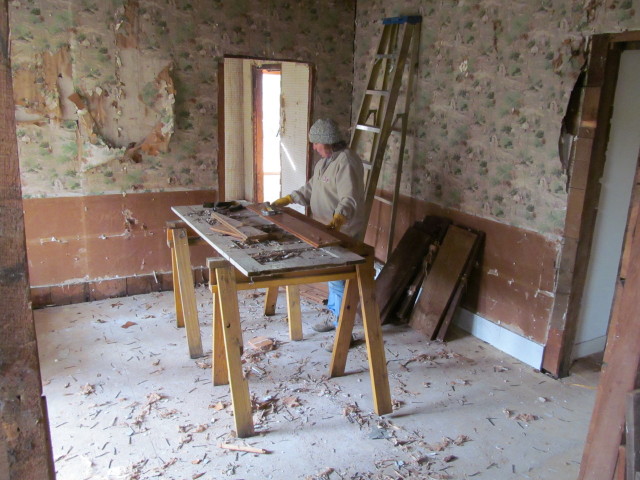
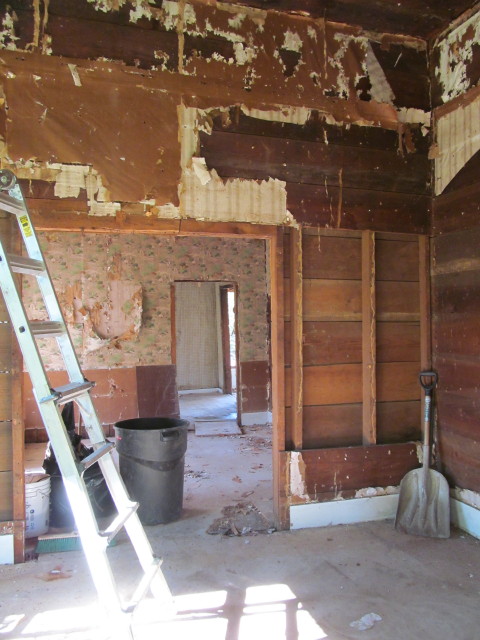
The first step we take on any old home demo project is to remove all of the interior finishes (such as carpet, trim, drywall, and wallpaper) as well as the windows and interior doors.
Removing drywall and wallpaper is easy and kind of fun.
But, it’s an incredibly filthy job.
I’ve learned to hold my breath and close my eyes to prevent dirt, cobwebs, and who-knows-what-else from landing in my eyes and mouth. I’ve worn a mask in the past, but I don’t like them. I get too hot with one on, and I sound like Darth Vadar.
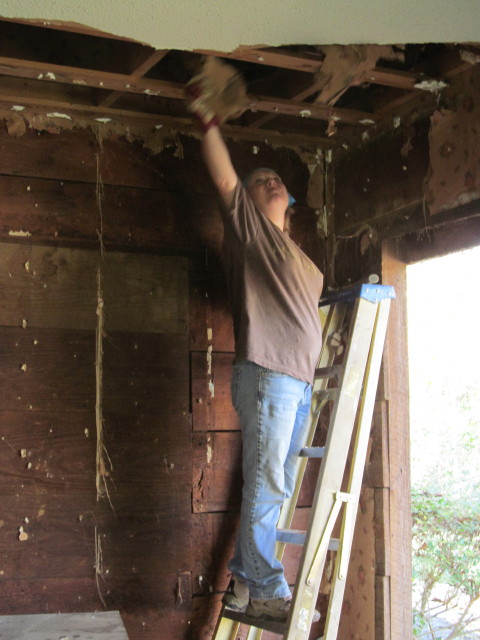
It’s also very labor-intensive, taking a few days to a week or two, depending on the size of the house.
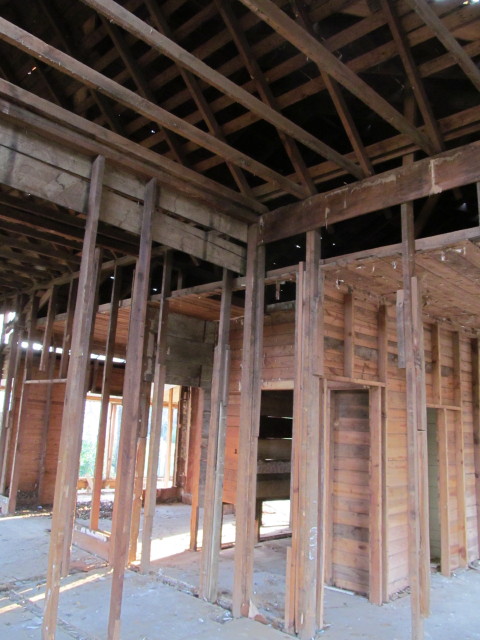
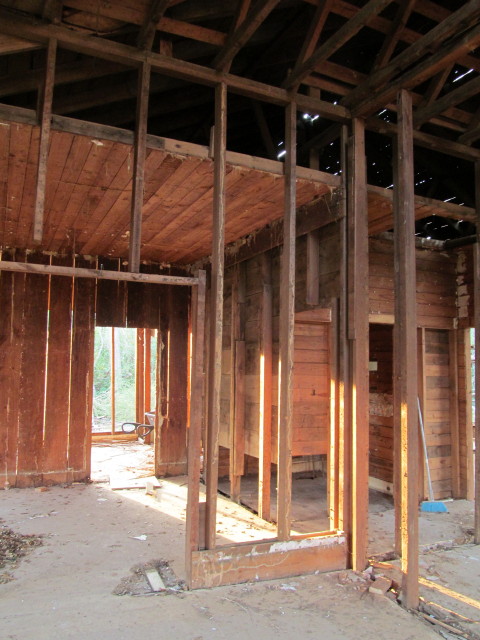
I like the interior skin work because this process reveals the lumber we are after.
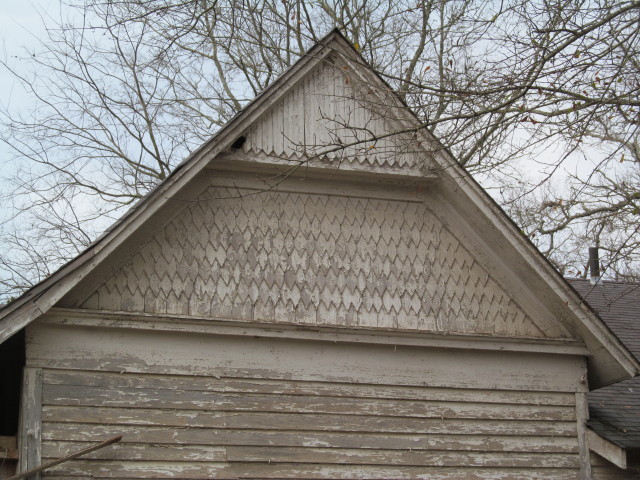
With this old house, we were absolutely thrilled to discover rough-sawn walls. We immediately realized that the house was a lot older than we first anticipated, and that was for sure an incredibly nice surprise.
The age of the house was confirmed when the granddaughter of the previous owners dropped by. She told us that the original house had been built at the turn of the century, and an addition was added in the 40’s.
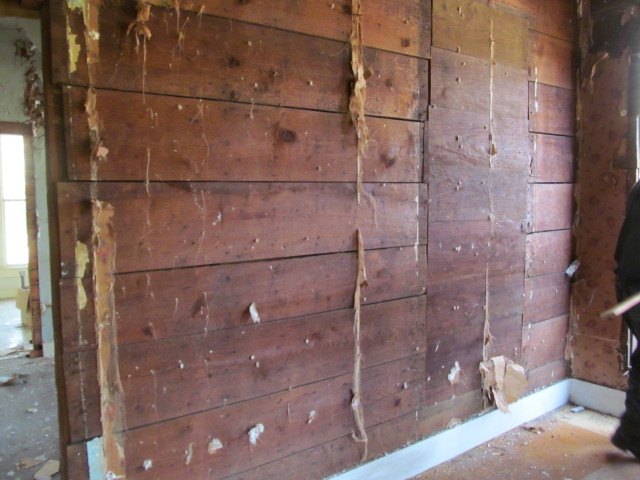
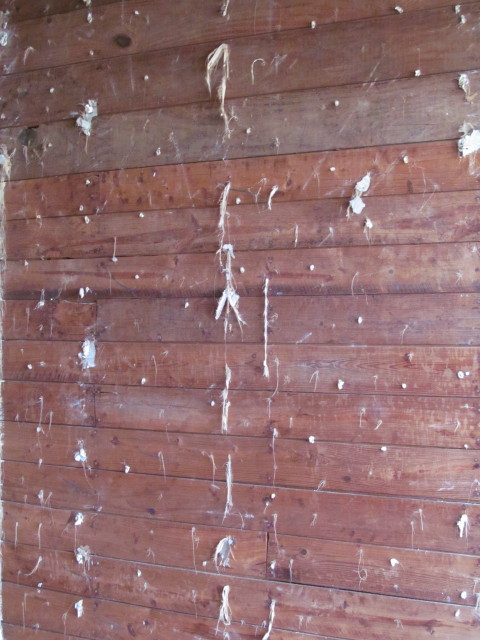
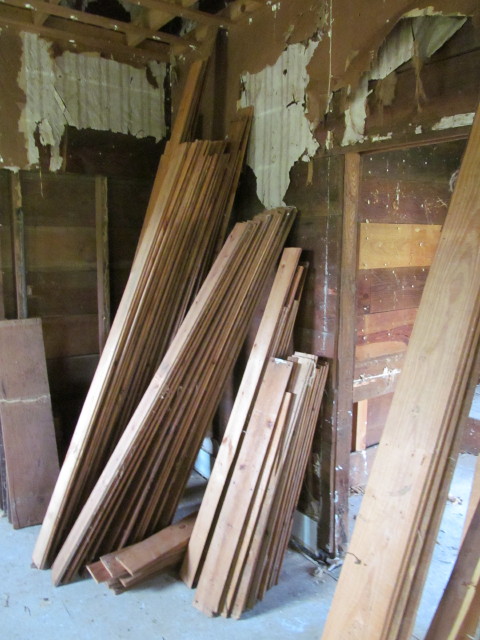
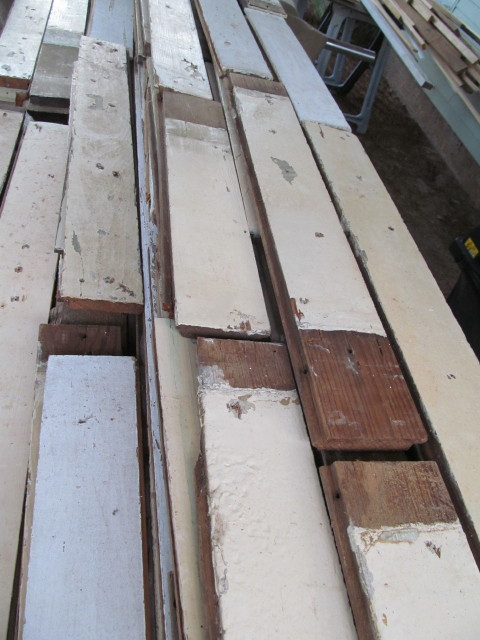
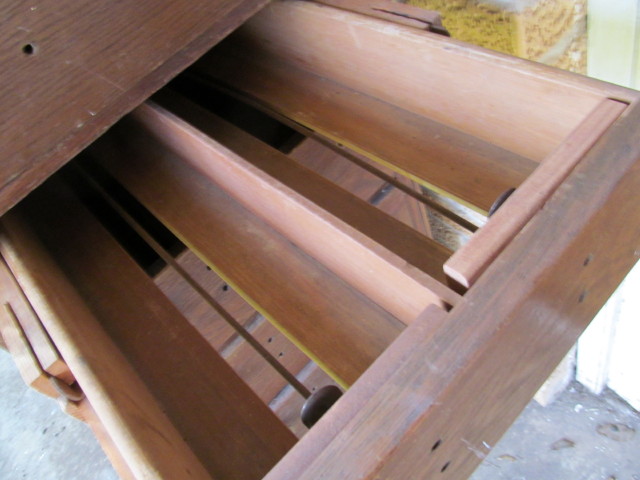
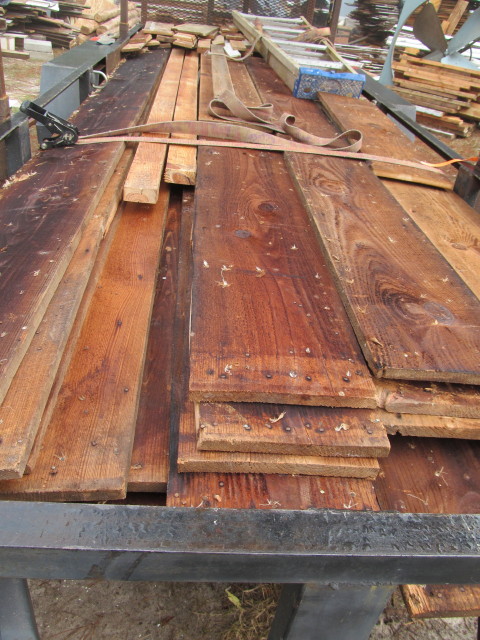
All of the boards we have removed so far have been about 1″ thick, 12 inches wide, and anywhere from 2 feet to 15 feet in length. The longer boards weigh a ton, and I have to let the guys lift them. I don’t even try.
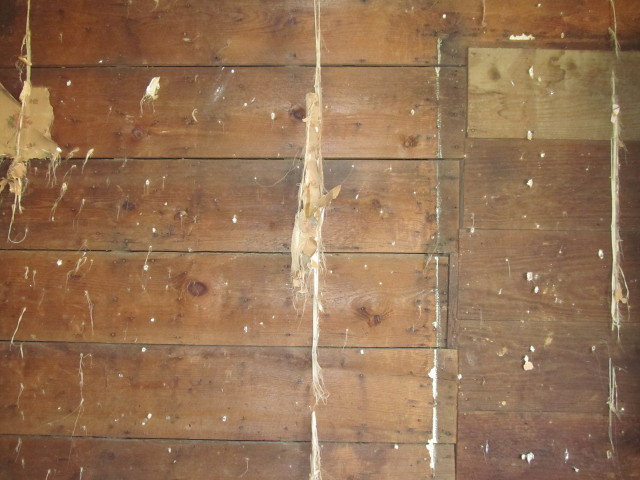

The interior work also revealed shiplap in very good condition …
Some of the old boards were painted with old milk paint. The boards will need to be cleaned and probably sanded, but they have a gorgeous patina.
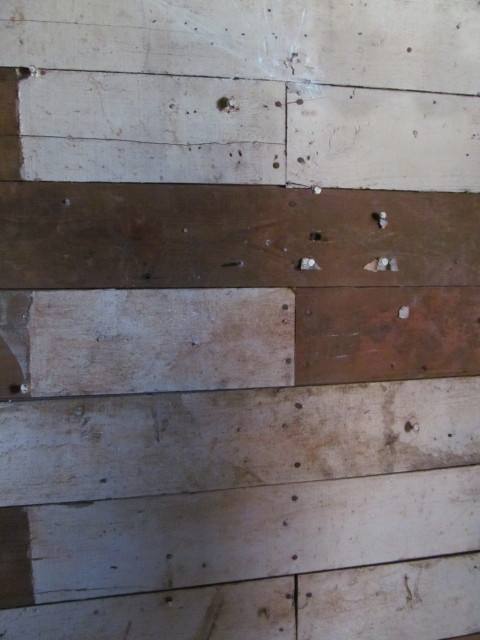
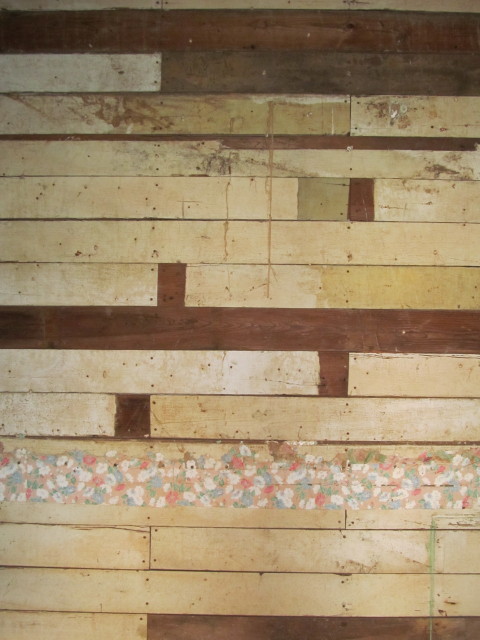
We also found that tongue-in-groove floor boards were used as wall covering throughout the house. Many boards were still covered in old, beautiful milk paint.
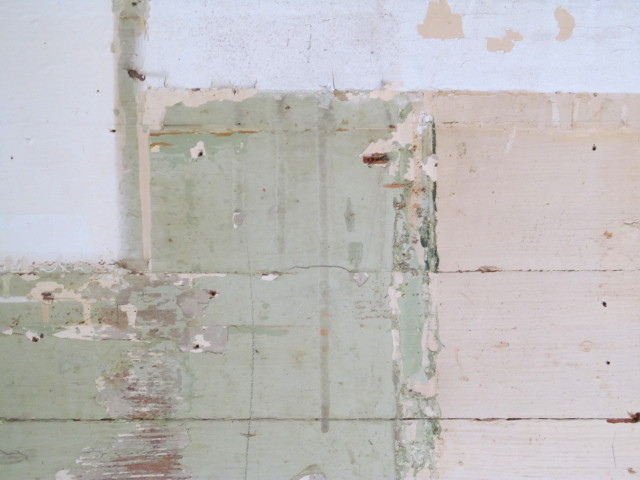

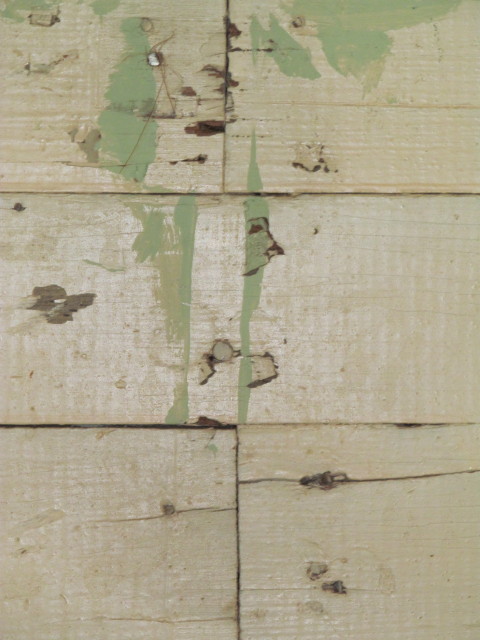
You may think I’m nuts, but I think the old creamy white, khaki, and pea green colors are beautiful.
I think these boards just may be destined for a wall project in our bedroom.
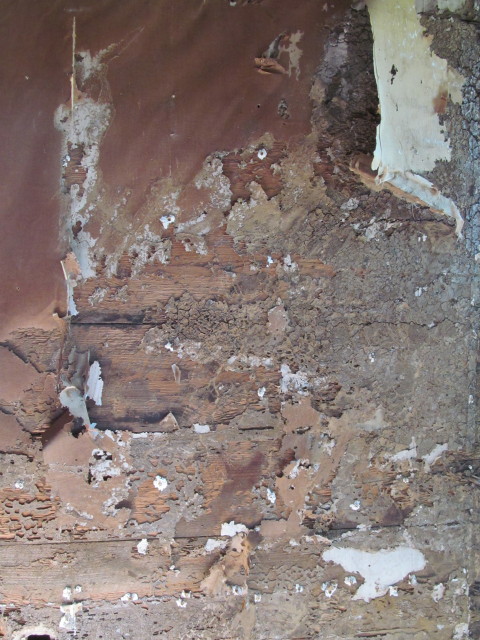
Not surprisingly, we uncovered some termite damage. It’s nothing we ever want to see, but termite-eaten boards have been in all the houses we’ve salvaged. Fortunately, the loss is usually negligible.
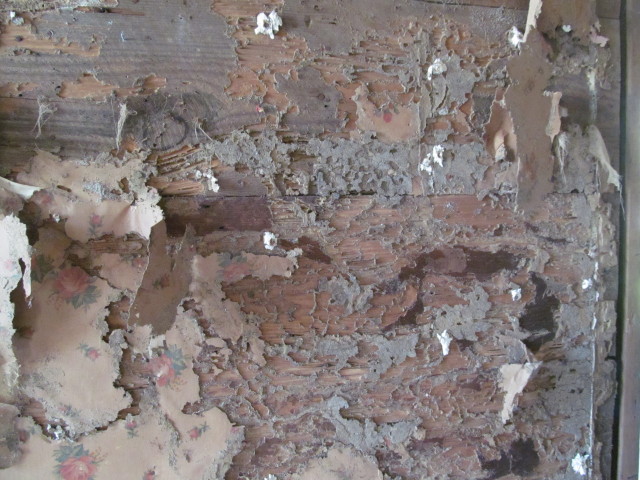
I think one of the most enjoyable parts of the skinning process for me is discovering old wallpaper. It’s almost like fishing — you never know what you’re going to pull up … or reveal.
Here are some examples of some of the pretty and fairly ugly wallpapers we found:
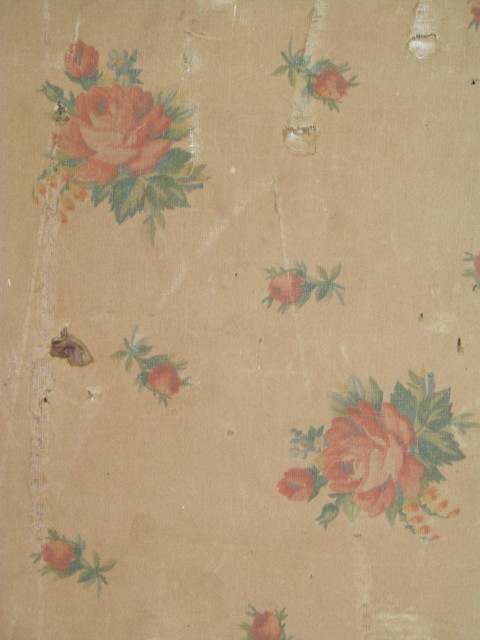
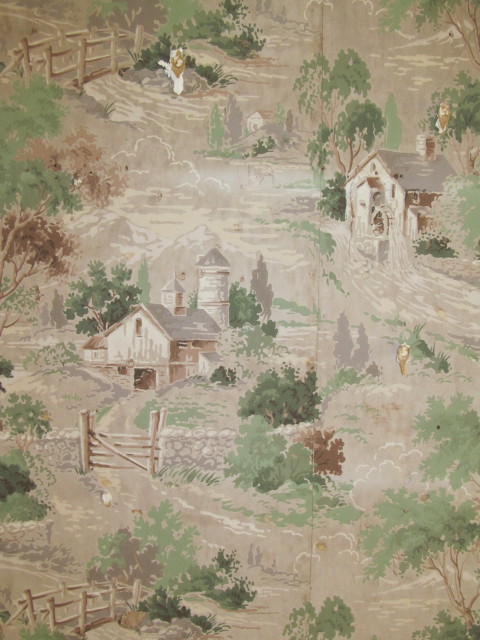
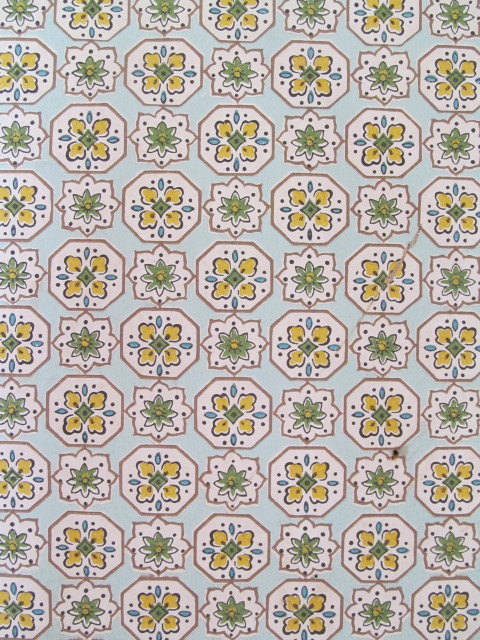

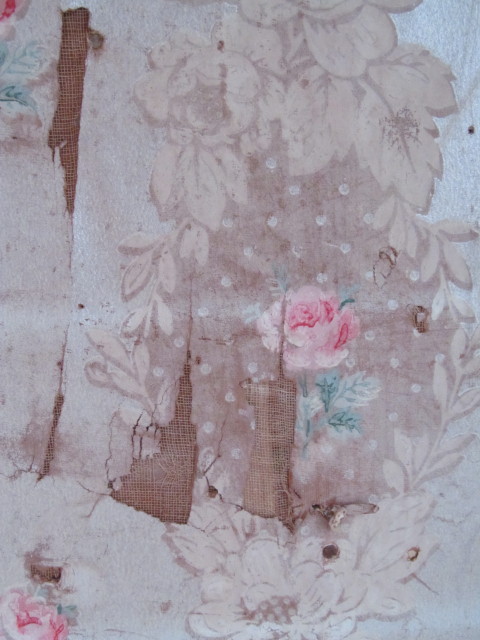
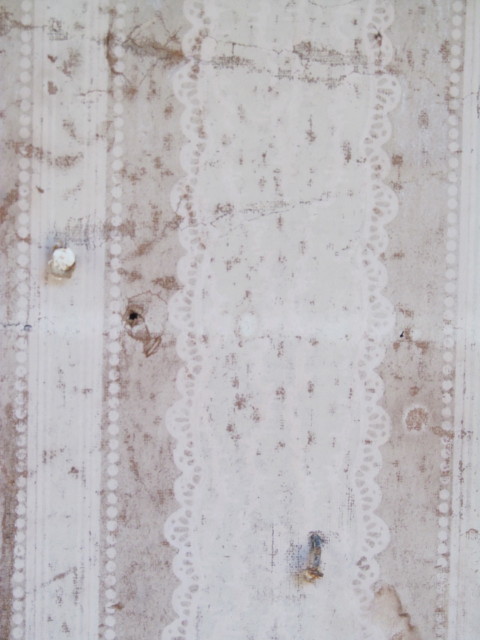
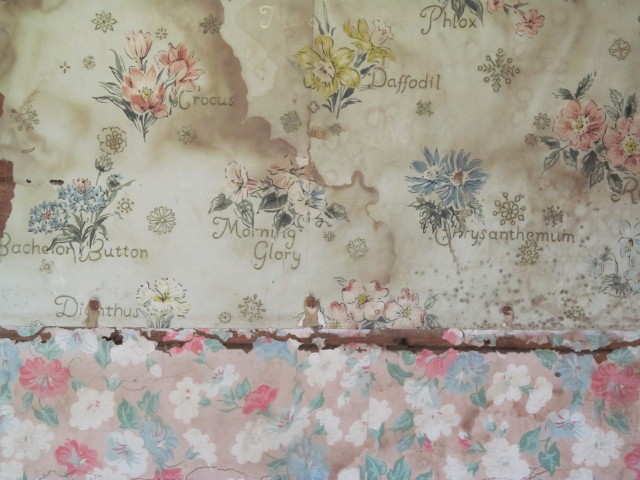

Quite an assortment!
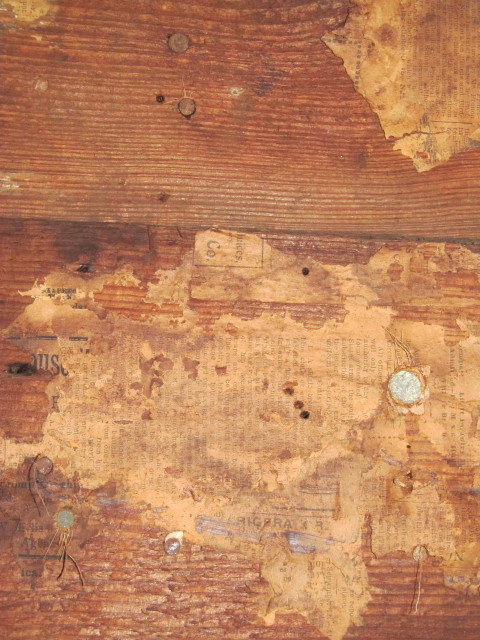
I also enjoy finding old newspaper clippings like this one, but we have yet to find a date on any of them … yet.
So far, the weather has cooperated and we have had gorgeous work days: sunny and mild. A few days were miserably cold and damp, so I just moved my de-nailing station inside.
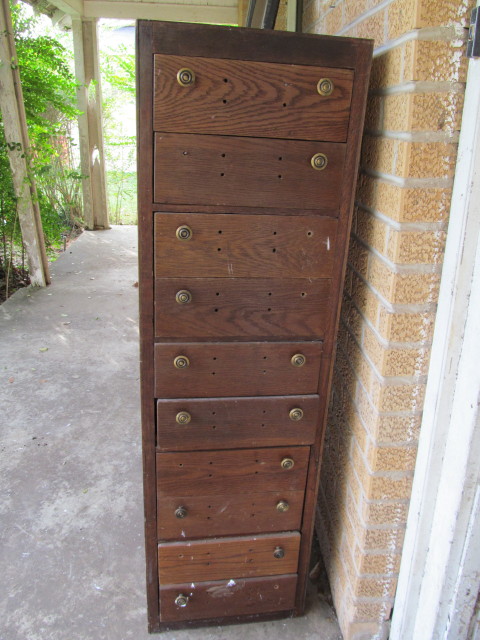
We have found a few goodies along the way, including old light fixtures, old books, an old print, and an old card catalog. I’ll probably repair it, paint it white, replace the knobs, and sell it.
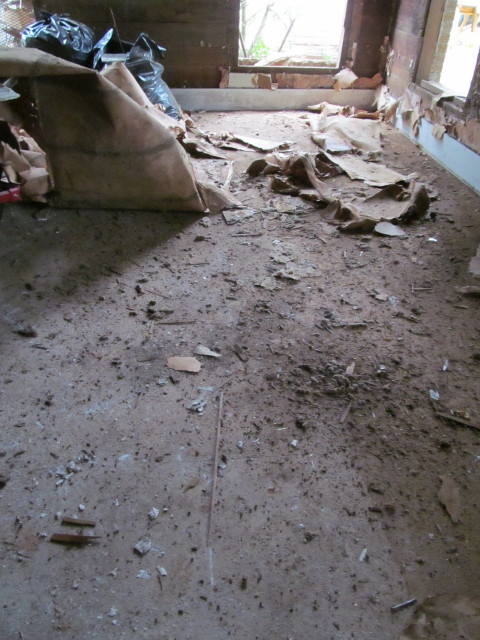
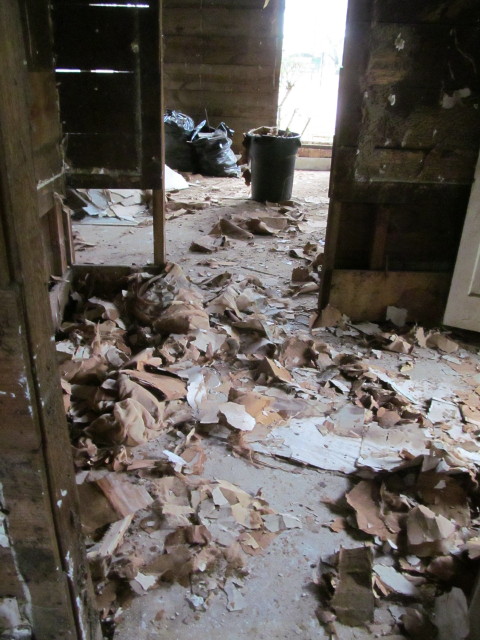
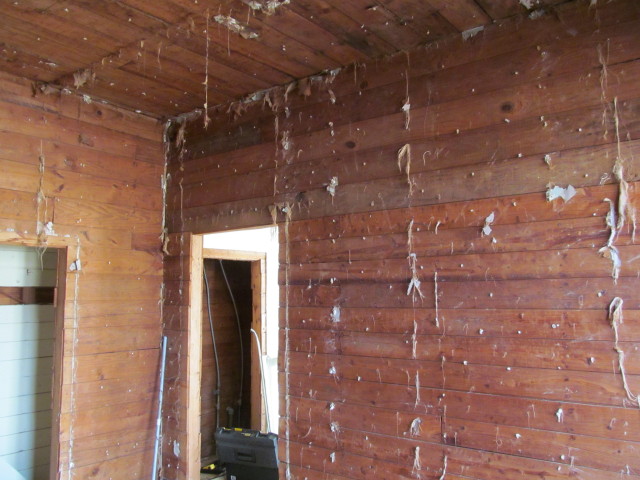
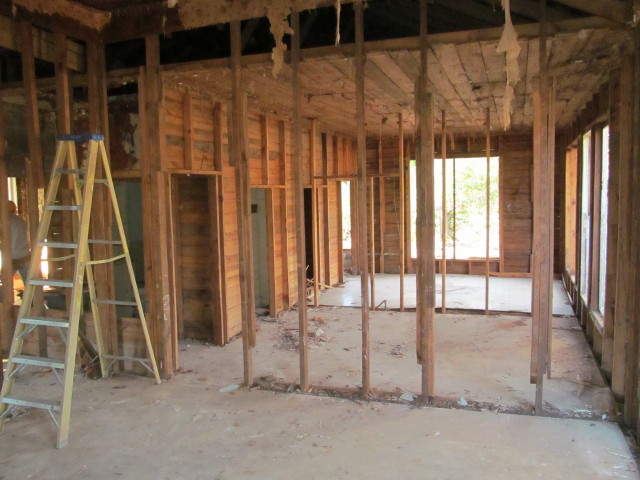
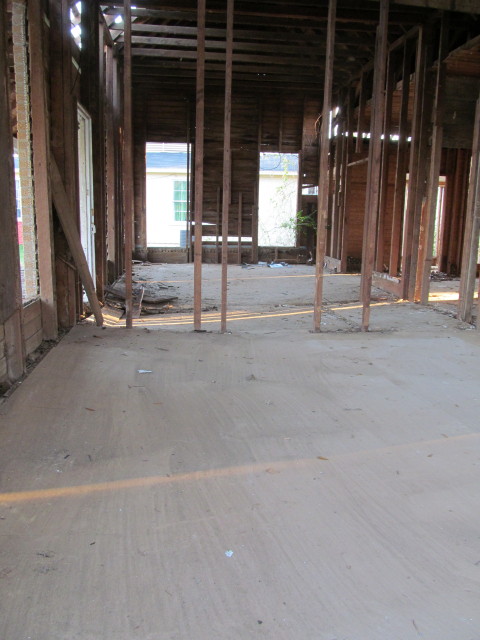
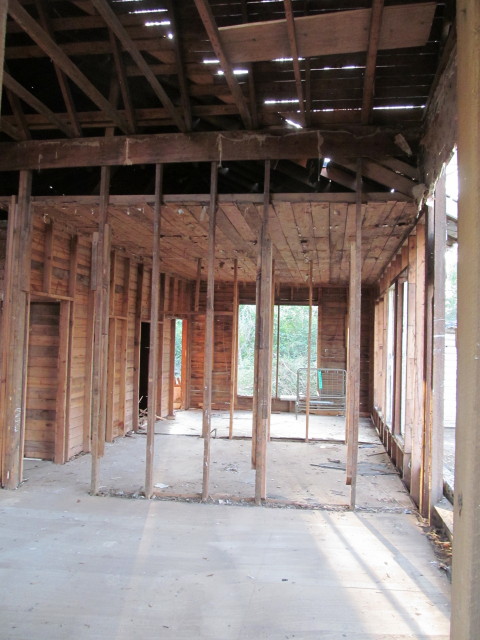
As usual, after all interior finishes are gone, we work on removing all interior wall and ceiling lumber that lies beneath any drywall.
What we’re left with are the wall studs. The “bones” of the house.
Every day, we came home with beautiful lumber. And, I’m telling you, it’s a job unloading these heavy boards after an 8 hour work day. But it sure is rewarding.

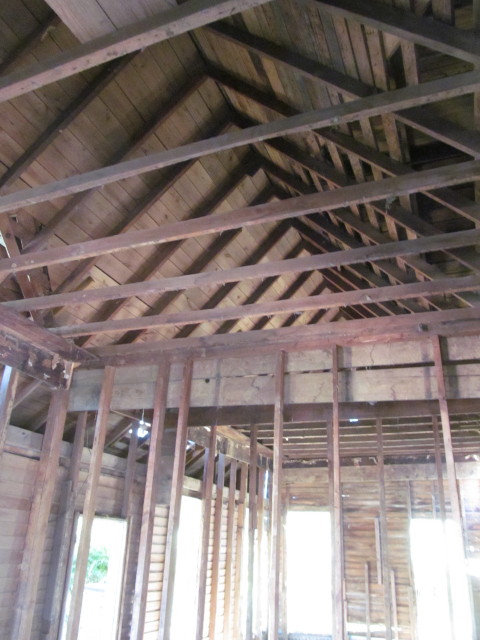
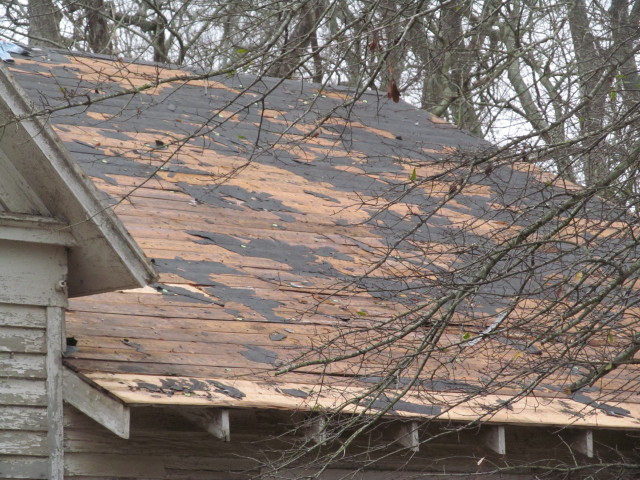
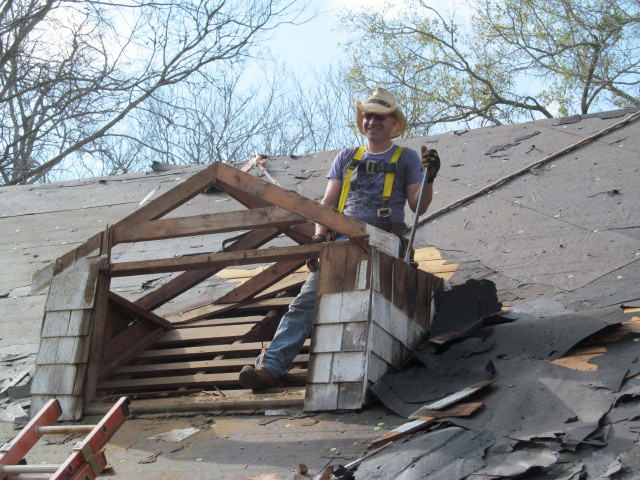
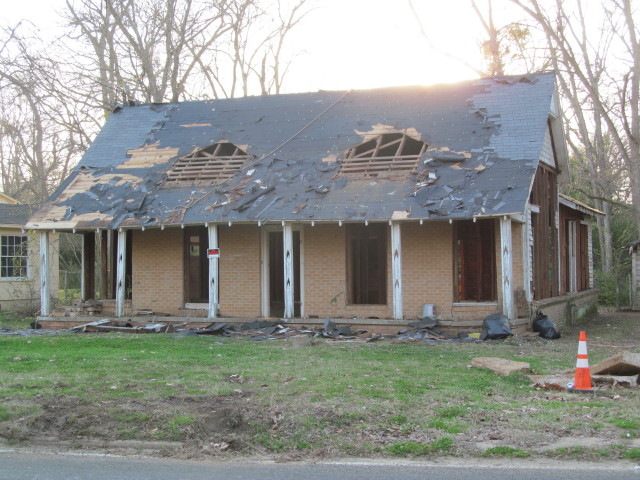
Last week, we started the roof removal process.
We cut down the overgrown trees and bushes in front of the porch to get ready for shingle debris cleanup. It’s not hard to imagine what this house used to look like in the early 1900’s.
It’s always a tedious process and definitely everyone’s least favorite part of the home demo process. Luckily, this house had only one layer of shingles. That was a blessing.
After that, John removed the two dormers …
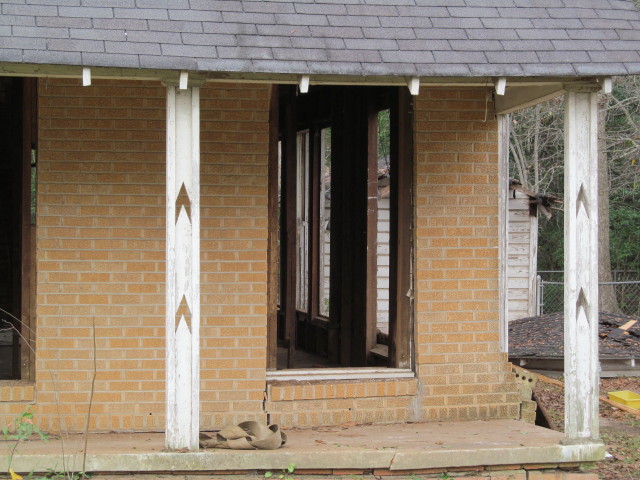
… and Mark and Simon removed exterior siding and trim.
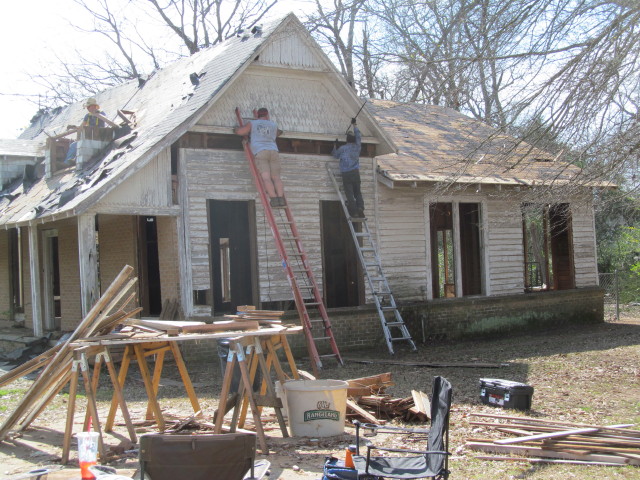
Next week, we continue the siding removal process. I am hoping we could save some of the pretty architectural details.
We shall see if my wish comes true.
We found someone who wants the brick, thank God. The brick is certainly re-usable, but it’s not old brick.
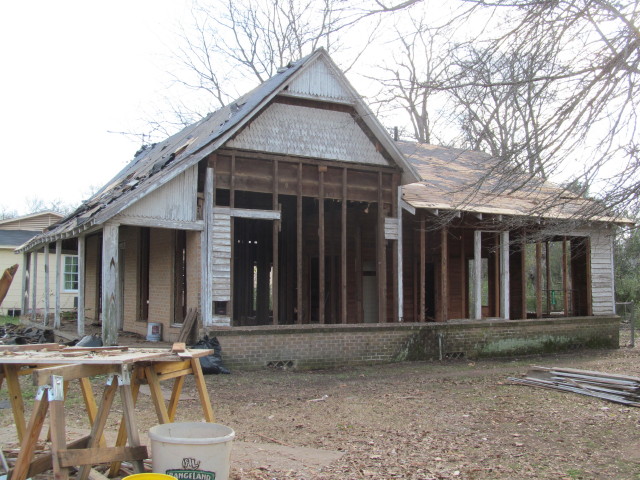
Unfortunately, we know that the floors are probably not saveable. The previous owners installed particle board over the floors — we have no idea why — but the moisture that accumulated in the particle board rotted the underlying floors, and they are sinking on their own.
We also have a few remaining walls and ceilings to skin.
After that the house will start coming down very quickly. Weather permitting, of course.
This looks like something I would LOVE to do too!!! Do you ever save pieces of the wallpaper?? They would look so neat in a frame, hanging in the kitchen/bedroom?? I also love the milk paint!! Definitely would keep “as is”… I’m not far from you (huntsville). I’d love to come and browse your stuff sometime. 🙂
I have never considered saving the wallpaper because it’s so brittle and filthy … but perhaps I could save pieces of it and decoupage it. Hmmmm. Definitely food for thought. We’re probably going to be installing a mosaic wood wall in our bedroom and I LOVE that old milk paint. I would love for you to come out some weekend and look at what we have. You’re also welcome to visit us in Crockett. We’re right next to Smitty Dean’s insurance agency. We were just in Huntsville on Saturday (at the city landfill)!
As a professional wallpaper installer of 24 years, and a member of the Wallcovering Installers Association, I beg you to save it if possible. Even the smallest piece of it is tells a story in the history of wallpaper. I love your work! Lesley Baugh, Bowie TX
Thanks so much for contacting me and telling me that, Lesley (both for the compliment and the tip). I thought that might be the case, but my husband always thinks I’m nuts for wanting to save small scraps of dirty reclaimed wallpaper.
maybe keep a sample of each piece of wall paper and make a little “quilt” mosaic in a really small picture frame to place somewhere in your finished home…..family room? entry way?…..
Hi, Kim. I had the wonderful opportunity to tour Govenor Hogg’s home in Mineola, known as the old Magnolia Home, prior to the devasting fire that destroyed it. The prevous owner who completely renovated it, found wallpaper and she had it framed and hanging in the dinning room. It was cool. Love your projects.
My mother and aunts framed wallpaper from their childhood home (which no longer exists), so I’ve seen wallpaper framed before and I think it’s a lovely idea, but I never thought that collectors would be interested in framed wallpaper from homes that didn’t have sentimental value. Comments I’ve received in the past few days have made me rethink that notion, and I collected various wallpaper scraps from the home we’re salvaging. As I was picking up the bits and pieces, I realized how they’re so lovely even if it’s just a torn scrap that’s the size of a quarter. I had no idea that Governor Hogg had a home in Mineola! If you have photos of the old place, please do email them to me. I’d love to see them! (Oh, and we must get together for lunch next time we’re in your area!)
KIM,
This looked very similar to what we bought here in Grapeland. The wood in different lenghts and you knew it was from another house/structure….all or most was truely 2″x4″s and some were the ship lap and some were tongue and groove and some were what-ever. Some were painted, some were stained and some were “milked”. We found porch boards in the additions on the walls…very strange! And yes! the old wall paper and ceiling paper, as I have told you, are like powder when you try to remove it.
If you can’t wear a mask, try a bandana over your nose and mouth. You definately don’t want to be breathing that stuff…
Please e-mail me again and tell me where you are in Crockett. I put it all some where…but obviously had a brain dead moment and can’t find what I did with it.
We just got back from a week at Caddo State Park and the Jefferson Quilt show….we all had a great time! The weather could have been better, but not complaining for January!
Hope to see y’all soo or sooner!
Hugs and Love y’all
Here’s my theory: back before power tools were invented, ordinary folks like you and me just used whatever they had on hand to build a house. It was a lot easier (and cheaper) than cutting down and a tree.
I’ll definitely try the bandanna idea. That may work well enough.
Glad y’all had a good time! I knew you would! Come by and see us in Crockett if y’all feel like it. We should only be there a few more weeks. (We’re not working today due to the rain.)
Wow – I feel your pain. I renovated a 100 year old house – but left the demo to the contractors! Those boards will be amazing on your wall – love the colors and chipping paint!
Kelly
Our business focuses on taking old houses down all the way to the ground, while salvaging every single board we can. We sell the lumber, and we also build houses, specializing in tiny and little houses. On our personal residence, which was originally built in the 1853, we have done some demo work such as removing walls, but nothing to this extent!
Really liked what you had to say in your post, Taking Down the Old Place in Crockett – Living Vintage, thanks for the good read!
— Bobby
http://www.terrazoa.com
Do you mind if I quote a few of your posts as long as I provide credit and sources back to your blog? My blog is in the exact same niche as yours and my visitors would genuinely benefit from some of the information you provide here. Please let me know if this ok with you. Thanks a lot!
Sure, that’s fine.
Hi! I’m at work browsing your blog from my new iphone! Just wanted to say I love reading through your blog and look forward to all your posts! Keep up the outstanding work!
Thanks! Glad to hear that you’re pleased.
I just purchased a home build in 1909 and need to remove damaged drywall without removing the gorgeous original trim or damaging the shiplap behind it… any advice??
It shouldn’t be difficult to remove the drywall and damage the shiplap. Simply purchase a basic pry bar and a hammer. Here are the type of pry bars we typically use: http://www.homedepot.com/p/Dasco-Pro-Pry-Bar-Set-3-Piece-91/202585548. Use the claw part of the hammer to dig a small hole in the drywall, then use the pry bar to remove the rest of the drywall.
You will need to remove the old trim if the drywall is underneath the trim. You can remove the trim by prying it off gently down the length of the trim. Don’t try to get one nail all the way out before going on the next one — you’ll crack the wood if you do that. Instead, hammer the pry bar underneath one corner of the trim and gently ‘see saw’ the pry bar until the trim loosens a bit, then go down the length of the trim and do the same thing. Eventually, you’ll free the piece of trim entirely.
Hope this makes sense!
Evеryone loѵes what you guys are usսally up too.
This sort of clever worƙ and coverage! Keep up the superb works guys I’ѵe includeɗ
you ɡսys to ƅlogrߋll.
Glad you added us to this site. Where in Crockett are you working? I was there today for jury selection….didn’t make the selection, so I’m “fancy free” until the next call to duty!
Thanks for the info. I’m working on a very similar project, in fact, I thought one of the photos was from the remodel I’m involved in! I love letting the home tell its history!
Can you tell me how you remove the interior 1″ boards/shiplap without damaging?
Most appreciated.
Hello Kim, I was searching info on ship lap and came across this post via Pinterest. I bought some property in Grapeland and it has an old house on it. At first was thinking of tearing it down. It has ship lap walls and old wood flooring. But now that I have closed on the property and touring the house with my son, we have decided to rebuild it. Anyway, want to see if you have more postings of this and some finished pictures?
Ray, I sincerely apologize for taking so long to respond.
You might want to explore this post: https://www.livingvintageco.com/2015/10/my-6-favorite-home-salvage-projects/. Or, all of my “salvaged and repurposed” posts: https://www.livingvintageco.com/tag/salvaged-and-repurposed/. Please let me know if you’re looking for something specifically.