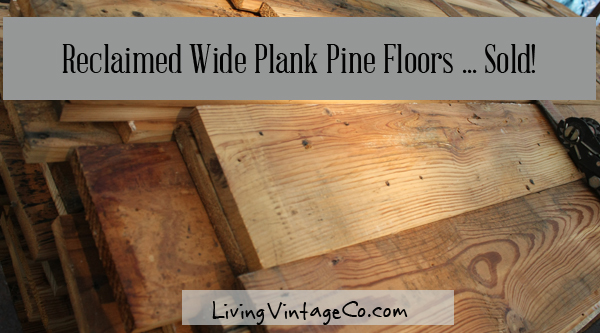
We recently sold almost 1,900 square feet of reclaimed lumber.
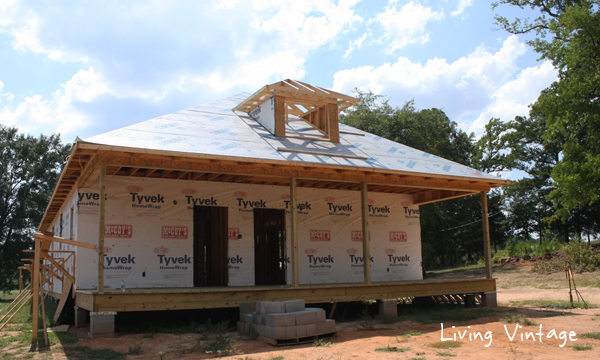
Kim and Adam Barton are building a new bungalow near Garrison, Texas.
Like us, they are huge advocates of salvage and repurposing. They want to add age and character to their new house by installing reclaimed wide plank pine flooring. They want to achieve a look similar to this salvaged floor recently featured on Remodelista.
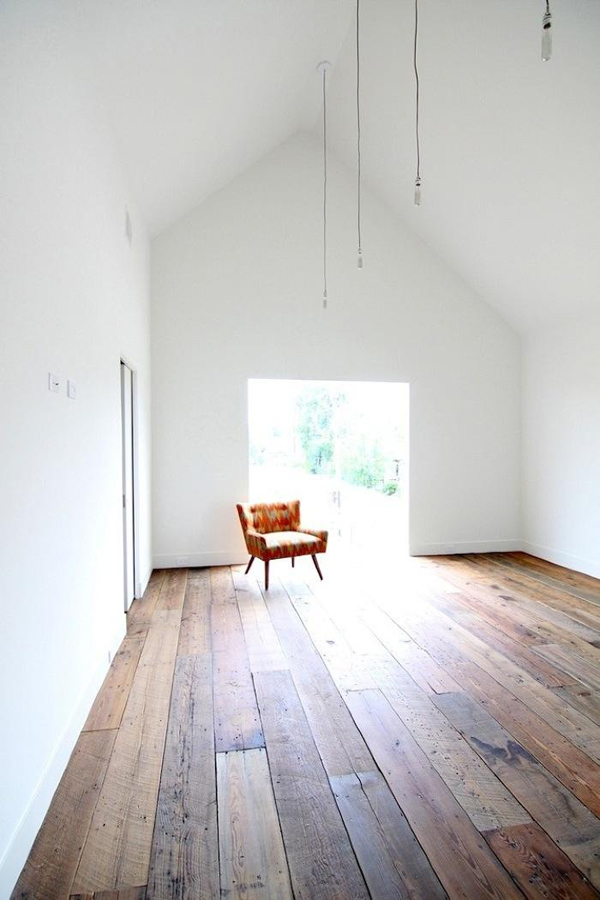
Can we all agree this is a yummy floor?
Luckily for us, they located us through Facebook. (Yes, check that box. Social media DOES indeed work!)
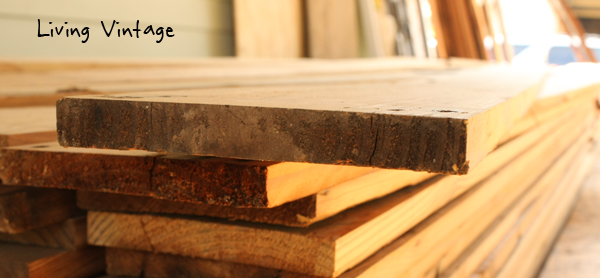
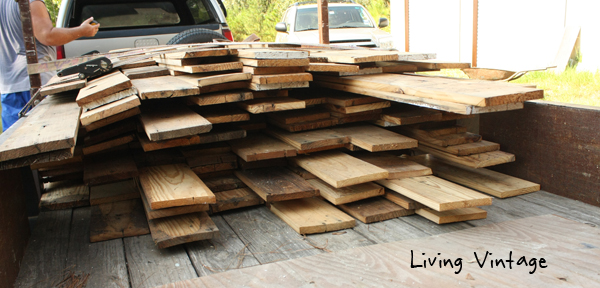
After salvaging seven old houses in the past year, we have a wide variety (and several thousand square feet) of old wide plank boards in stock, including shiplap, center match tongue-in-groove, and rough-sawn pine boards. The boards we have available for sale which are suitable for use as floor boards are from a few inches wide up to 12 inches in width.
They chose our 8″ wide shiplap boards.
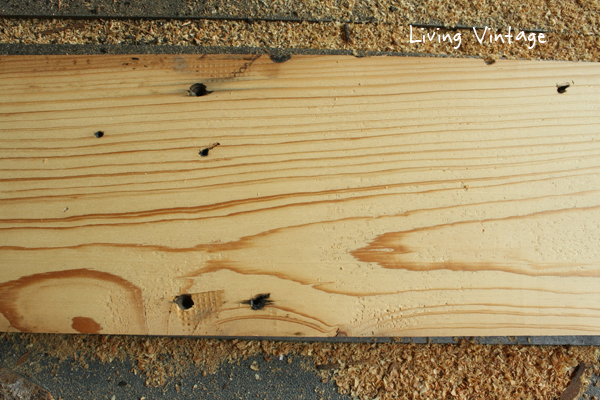
Due to their age, some of the old shiplap boards are slightly cupped. It’s not uncommon to see this. So many of the old houses we salvage are exposed to wet weather …. and/or the old house sagged due to foundation issues.
We discussed this with Kim and Adam as part of the sale. Because they’re going to face nail the boards to the floor, we offered to plane each board and remove the tongue and the groove from each board to make installation and finishing the floors so much easier.
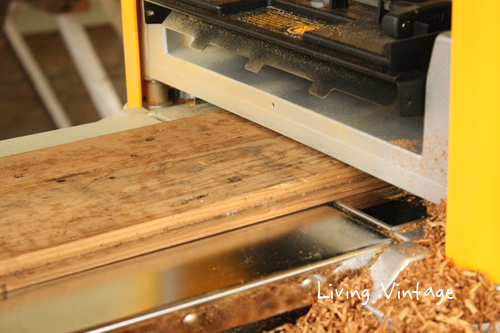
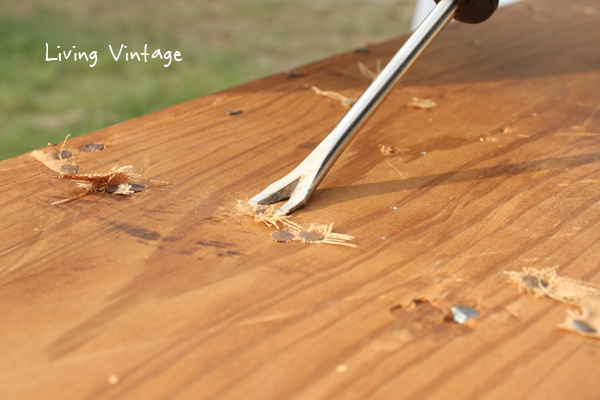
We’ve been hard at work the past few weeks cleaning and prepping the wood for installation. Our Dewalt planer is getting a workout.
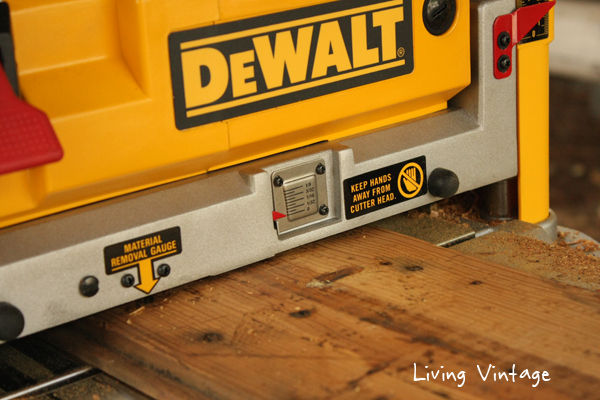
It’s one of our newest machines, and it’s working like a champ. We’re really quite pleased with it. We keep the blades clean and sharp to ensure the best quality finish.
It’s messy work.
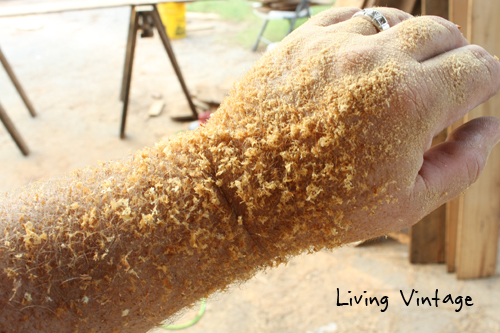
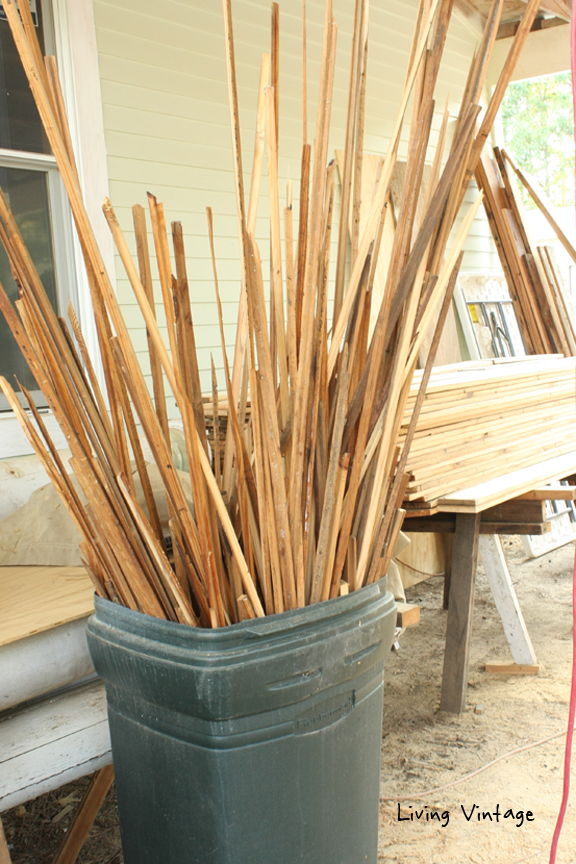
Also for every 30 boards we plane and cut, we haul a trash can full of waste to our burn pile.
(I’m not complaining. Just sayin’ what’s involved.)
Before we can trim and plane them, though, we have to remove hundreds of small tacks from the boards using a tack puller.
Tedious work but you can’t send metal through a planer!
If you’re wondering why the tacks are there, in many of the old homes we’ve salvaged, the boards were used on the walls, and the tacks were used to hang old cheesecloth and wallpaper.
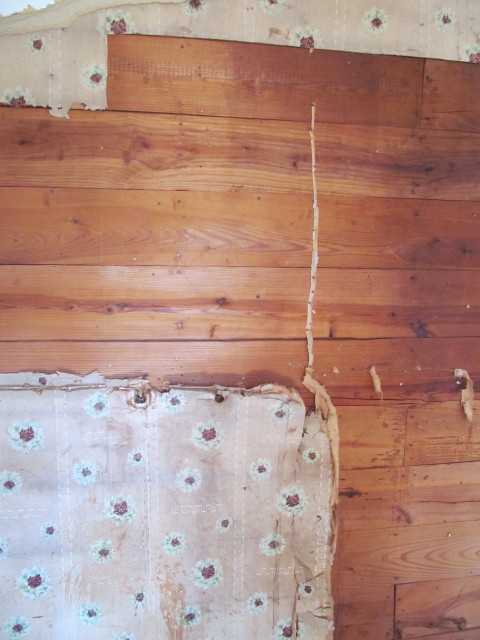
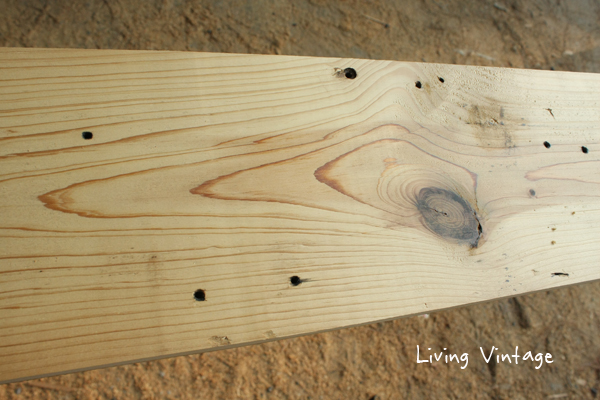
If they weren’t used on walls, many times they were used as roof boards. That’s why some of the boards have larger nail holes and black marks from roof felt.
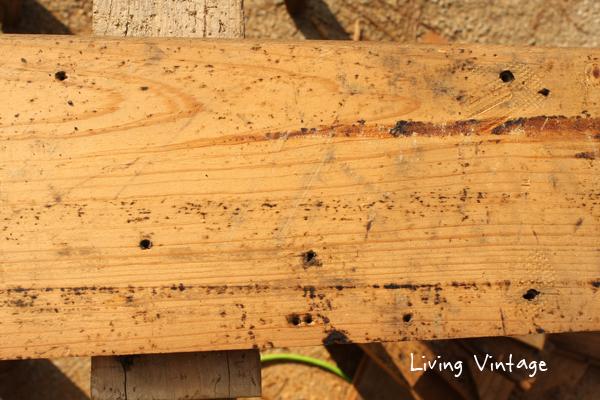
The black felt is easily sanded off with a palm sander or floor sander – we tested it!! — and the nail holes will lend beautiful character when Kim and Adam finish sand the floor before the floors are stained and sealed.
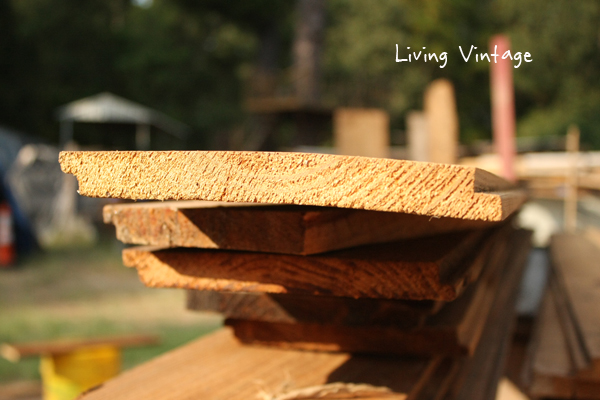
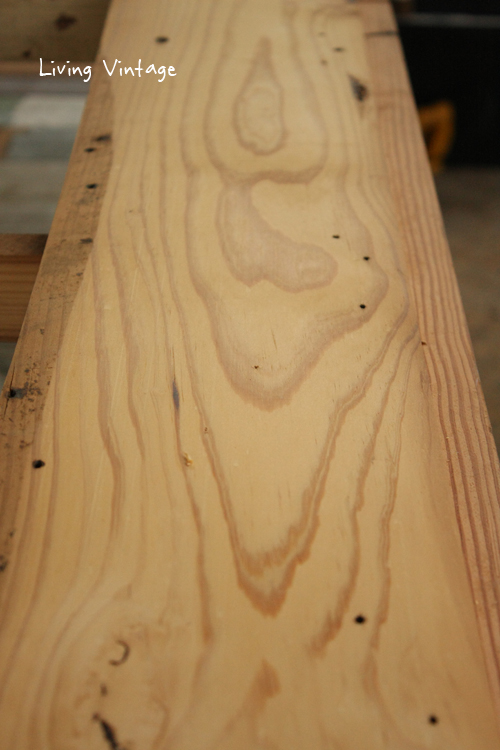
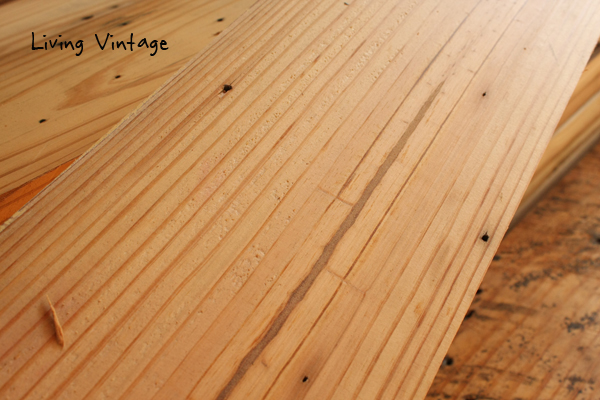
We’re planing each board down to 3/4 of an inch, so these old pine floors can be sanded and refinished many, many times during their lifetime. There is more than enough ‘meat’ on each board to plane it flat.
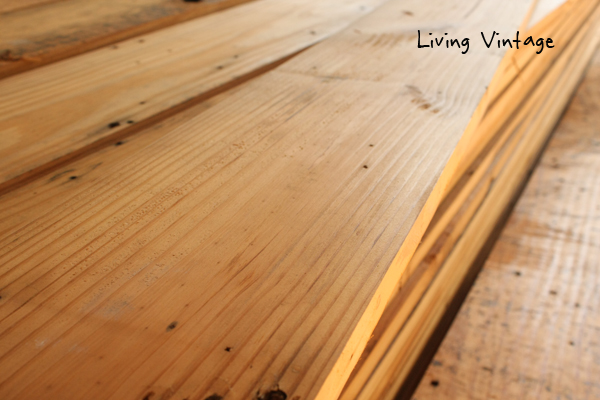
Gorgeous, huh.
I’m telling ya, that’s the enduring beauty of old wood … and one of the reasons why we started this business in the first place.
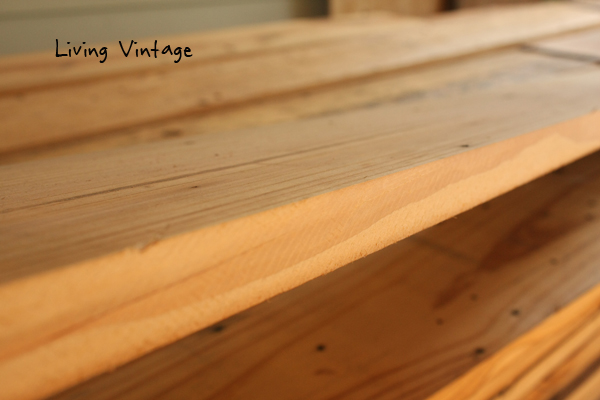
Planing the boards has revealed the beautiful grain of each board. Mark and I have ‘oohed’ and ‘aahed’ many times already.
We delivered roughly half of their order last weekend.

Anyway, we’re delighted that the Barton’s chose us to be their flooring supplier. We’re grateful to have made the sale, plus we met kindred spirits and made new, lifelong friends.
I’m sure you’ll have pictures to share of these wonderful old boards in their new home too! I also can’t help but wonder (thanks to you) what you could do with those strips of wood in that trash can…..hmmmm….toothpicks?
You betcha, I’ll certainly share that when they’re installed and finished! I’ve been using some of the strips for paint stir sticks. 🙂
Yummy clear through the post – from wood to DeWALT!
Are you saying I had you at Dewalt? LOL!
Kim, I love what you all have done with all the reclaimed wood. We are in the process of renovating our old house. The previous owner (of 35 years) has told me the house was built about 1885.
We have discovered that the walls and ceiling were mostly covered in beadboard. The bedroom were are currently working on a bedroom and uncovered two walls of beadboard, one wall of 8″ shiplap and one wall and the ceiling were covered in 6″ tongue and groove and the original floor was oak 1X6’s! We can see that the next room built at the same time as this one had beadboard on the ceiling, so as you said in one of your posts that I read, they just finished it with whatever they had. The house (joists, studs and rafters) are made from walnut. We are reclaiming everything we can and intend to put some of the wood back in this room and save the rest until we have enough to finish out a room in beadboard and hopefully we can salvage all the oak flooring, plane it, add tongue and groove and use it in the master bedroom.
After telling you all of that, I really had two questions. With all the salvage work you have done, can you date old wallpaper by the pattern or design? As best as I can tell there were two layers of wallpaper and no cheesecloth, unless at some point someone removed layers. I have pictures of shiplap with the wallpaper intact. Also, when we reinstall the shiplap (or beadboard for that matter), should we add glue or caulk, something? to keep dust from coming in later on? There seems to be very little information online to help guide us through the process. I’ve salvaged an old hardwood floor before and some knotty pine panels but I’m at a loss with this. Since the grooves in the beadboard are full of dirt I’m assuming at some point that will happen again. My husband thinks we should sheetrock and install the boards over that but I’m just not sure about that method.
Thank you for any help!
Renee,
How exciting! I would LOVE for you to share photos with me periodically so that I can see the progress you’re making with your home. Isn’t it wonderful to discover all that old wood? It’s like a treasure hunt, and indeed that’s what it is because you just can’t buy old growth wood anymore very conveniently. (Unless, of course, you deal with a salvage company like ours.)
To answer your first question, I’m fairly certain that it’s possible to date old wallpaper. There must be experts out there, but I’m sorry, but I don’t know who to contact. I did a quick Google search and came up with a few hits. For example, I discovered http://answers.yahoo.com/question/index?qid=20080813011058AAOuXVv, which led to a wallpaper historical society in London. I also discovered this informational article. There are more. Just do a Google search using the keywords ” dating historic wallpaper”, and you’ll see what I found. Sorry that I couldn’t be of more help.
Regarding your second question, the answer depends on what’s behind the shiplap or beadboard. Do you see a hollow cavity and the backside of your exterior siding … or did the prior owner install insulation at one time or another? If I were a betting man, I’d say you’re likely going to find the backside of your exterior siding (i.e. no insulation whatsoever). So I would definitely suggest adding insulation (batts or rigid sheathing because I’m assuming you want to add energy efficiency to your old house?) and/or plywood to the walls before reinstalling the beadboard or shiplap. Sheetrock is another option but you would have to install the shiplap or beadboard horizontally to ensure that you nail to a stud. That’s why I suggest plywood rather than drywall. I would NOT glue or caulk. All homes shift over time, and the caulk or glue would crack eventually. All this being said, I am not a building expert and certainly not for colder climates than Texas, so I would suggest talking with a building professional in your area to see what they suggest.
Also, the old beadboad can be cleaned and reinstalled and cleaning it periodically would be little different than cleaning another wood surface. I’ve cleaned old painted installed beadboard many times in the past using Scrubbing Bubbles. Test it on a small area to see if it works well for you. Also, when I prepare beadboard planks for reinstallation in our home, I always clean it outside with a garden hose, dish soap, and bleach and let it thoroughly dry in the sun before we reinstall it. (I like to clean the front side of the board with the grooves AND the back side of the boards. Usually, the latter are filthier than the former.) I realize that may not be possible right now if you live in a colder climate. You need the sun and warmer temperatures to dry the wood quickly. If you’re located in Texas, do NOT leave the wood out in the sun too long or the harsh Texas sun will literally bake and curl the old wood.
Now, after reinstallation, if the old wood is painted and you want to keep the paint from peeling and/or you want to prevent exposure to probable lead-based paint, I would suggest covering it with 1-2 coats of polyurethane (in the finish of your choice), after the beadboard is cleaned, of course. Then you can clean it using Scrubbing Bubbles (if that worked well for you) or a liquid mixture of bleach/dish soap using a sponge.
Hope this all makes sense. If not, please let me know!
Best of luck to you with your project.
Kim
I just remembered a blog that you may want to get in touch with concerning your wallpaper questions. The blog is Rosie’s Vintage Wallpaper. Charlene might be able to help.
Kim, Thanks! We’ve already pulled it all out, at some point someone blew in insulation but I’ve read that is the absolute wrong thing to do in this type of home (moisture stays in. It has old lap siding but it has also been covered with steel siding….. Now, if I can ever talk my husband into going back to wood lap siding, I’d like to but that will have to be way down the line. Our house was balloon framed. So, we have to add wood between the studs at the bottom and we are putting in batt insulation. I never thought about putting plywood on the walls. We will have to consider that.
I had read in one of your articles about washing them down outside with the hose and I have already done that with a small amount of the beadboard, didn’t use scrubbing bubbles, I try that. I used a toothbrush to get in the grooves, that worked really good. We are in Arkansas and right now the weather won’t cooperate with me, so it will have to wait for a while, hopefully soon there will be a sunny warm day. I would be happy to share pictures, we are just now beginning the “reconstruction” phase, so hopefully in a few weeks, we will have something to smile about!
Thanks!
I have to thank you for the efforts you’ve put in writing this blog.
I’m hoping to view the same high-grade blog posts by you in the future
as well. In fact, your creative writing abilities has inspired me to get my very own website now 😉