I’m woefully behind on showing you what we’ve been up to lately on our home remodeling.
Despite having to devote almost all our time to working on a large lumber order, we have made time to get some things done in our master bedroom.
I wanted to show you what we’ve accomplished so far.
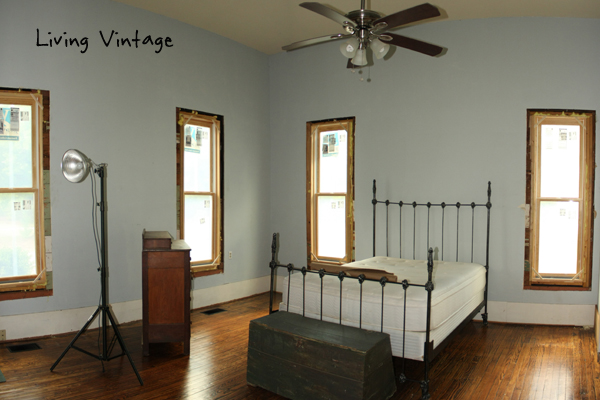
But, first let me show you what our bedroom looked like just after buying our place a few years ago. This photo was taken before we refinished our hardwood floors and before we replaced the old windows, insulated the exterior walls and replaced the siding.
(I haven’t blogged about these projects yet … but will.)
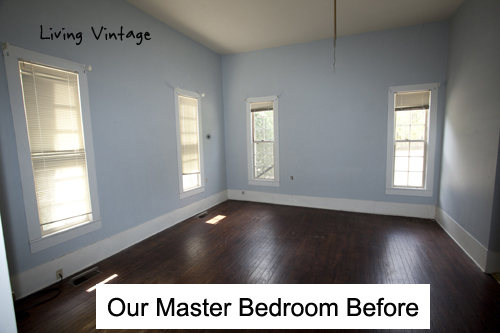
While the photo doesn’t show it very well, the room is fairly large: almost 16 feet wide by 18 feet deep.
Some of the features of the room, we didn’t particularly care for. For example, there was a small desk area that we knew we wouldn’t use.
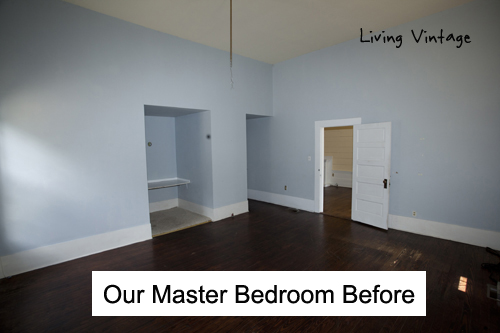
There was also a fairly large walk-in closet that was fine, but we knew that we wanted to use that space for our master bathroom.
There was also a small closet with a small hallway leading into the laundry room. We didn’t see the point of having a passageway to the laundry room in the master bedroom since the the dogtrot breezeway is just a few steps away.
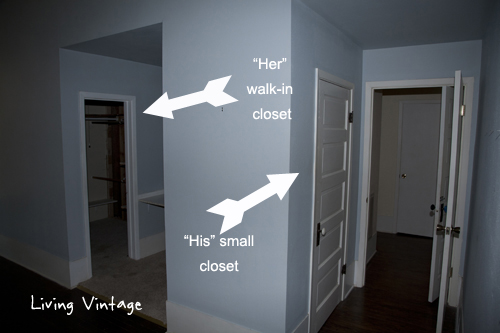
A few months after we bought our place, we reconfigured the space to add a walk-in closet and an entry to our master bathroom.
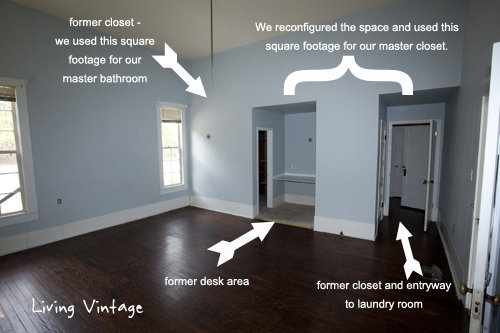
This photo does a pretty good job of explaining what we did.
We hadn’t done anything on our master bedroom since making those changes — we focused on other, more pressing projects, so this is what our master bedroom looked like just before we moved all of the furniture out of the room.
Not much different than the above photos, other than the new windows.
By the way, the area around the windows looks a bit odd because we never bothered to install new trim around the new windows.
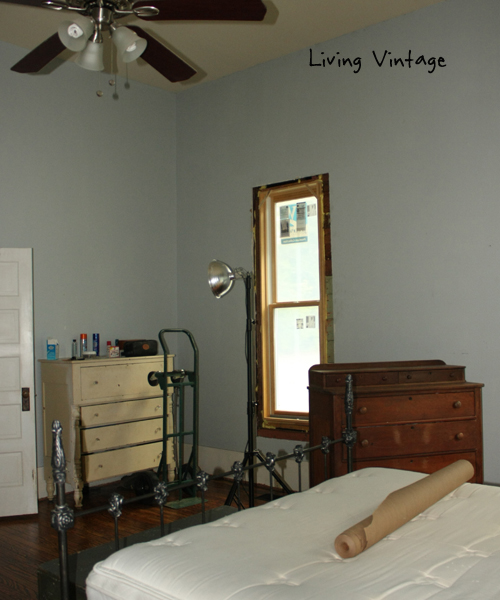
You see, we knew we were going to renovate the master bedroom eventually, and I knew part of that process would be demo’ing the drywall. I am not a fan of drywall (have I said that before?) — I’d rather have painted wood any day — and we knew there was old wood behind the drywall. So installing and painting window trim would have been a huge waste of time.
So, we just lived with the ugliness until we could do everything we wanted to do to renovate our master bedroom.
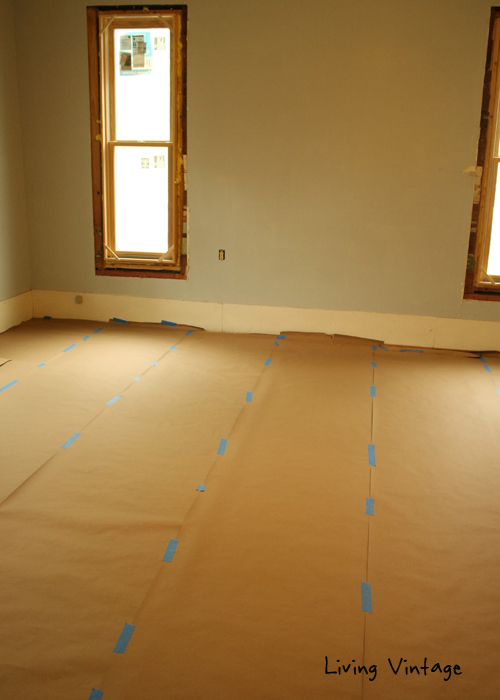
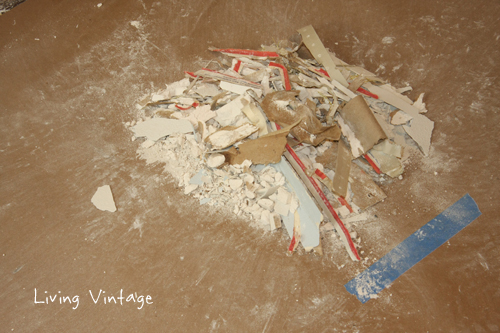
The first thing we did was cover the floors with protective paper to prevent our feet from grinding drywall dust and nails into our pretty hardwood floors.
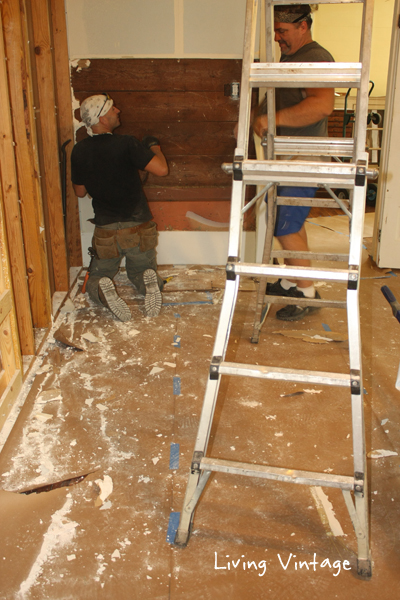
Next, Mark and our regular hired hand, John, started demo’ing the drywall.
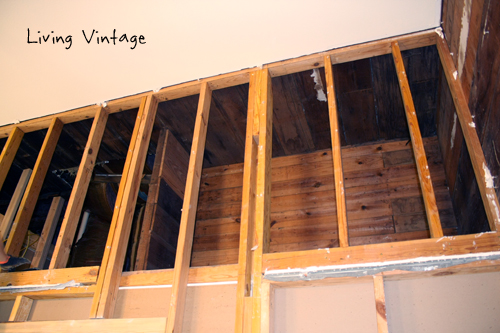
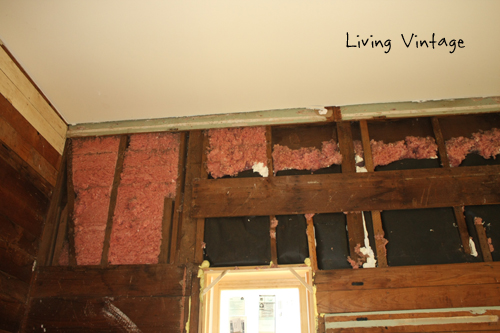
The first section of drywall to come off revealed what we feared would be there: round holes in many of the wall boards.
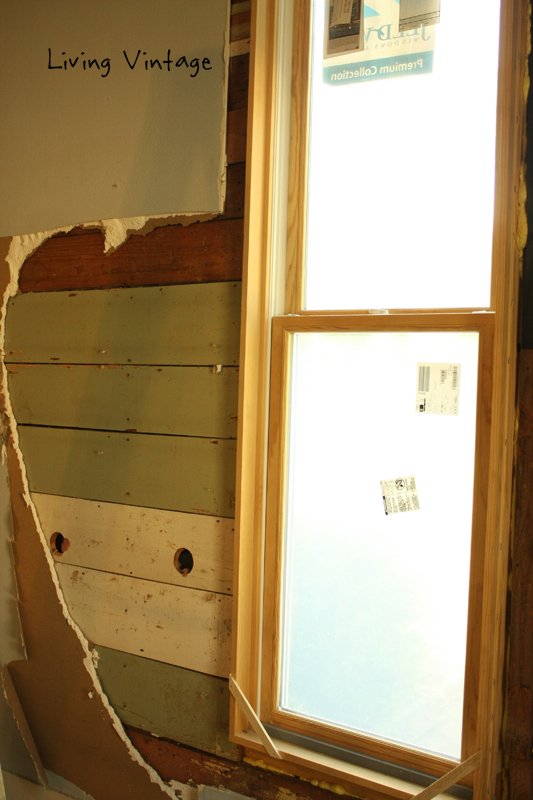
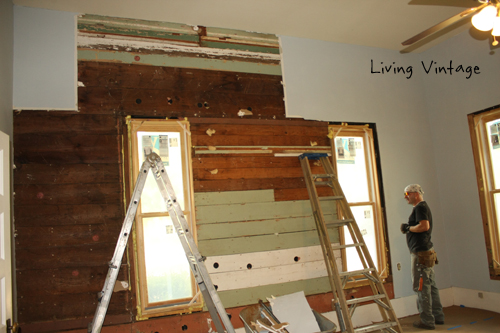
One of the prior owners had used a hole saw to drill through the old walls and blown in pink insulation.
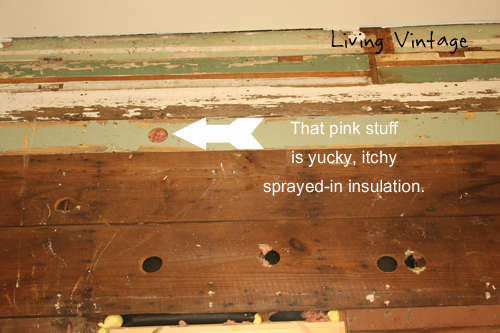
We would have to replace those boards.
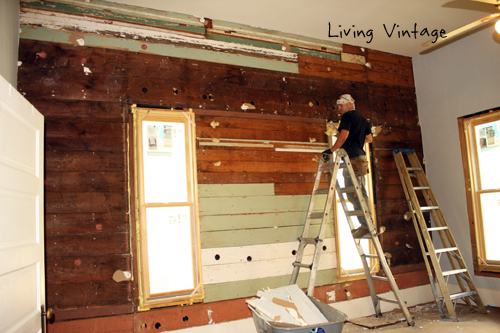
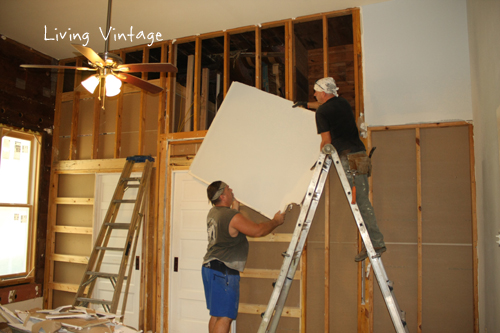
Before starting that process, Mark and John continued to remove the drywall from all four walls. After salvaging 7 old houses (so far), the guys have gotten really efficient at removing big pieces of drywall.
It’s still an incredibly messy process. Good thing we covered the floors.
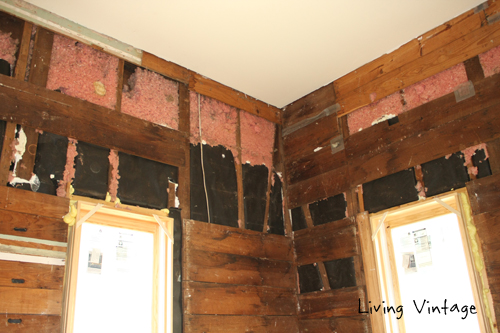
This is the wall that leads into our master bathroom and closet.
It’s an interior wall and the ceilings in the closet and bathroom are lower than the attic floor, as you can probably tell in this photo.
Throughout the entire drywall removal process, the guys carried large, heavy pieces out to our trailer.
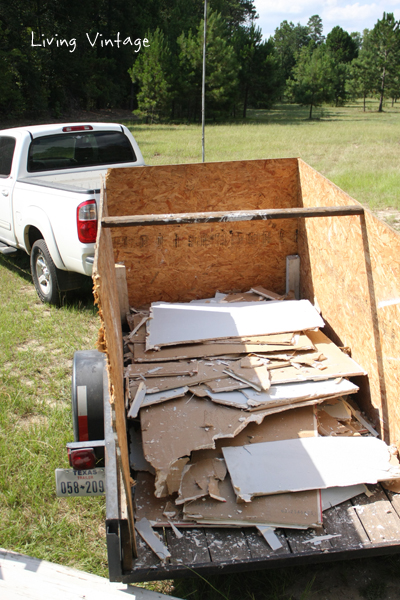
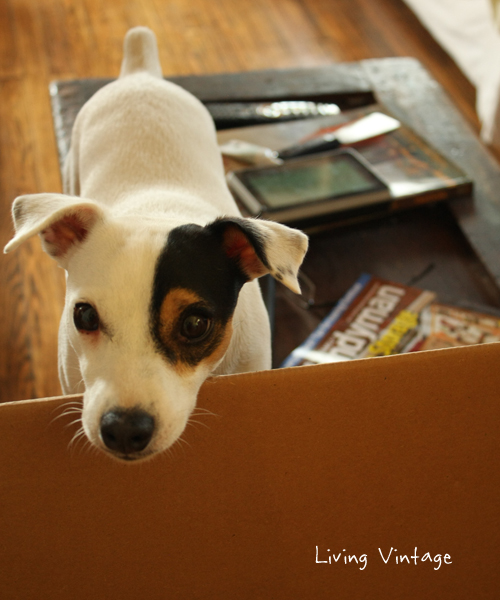
Because they were going in and out of the front door so much and we don’t have a fenced in front yard, we barred our dogs from that portion of the house. One of our dogs is a Jack Russell, and she’s impossible to catch once she gets loose!
Here she is. She was so cute standing on the trunk to watch us.
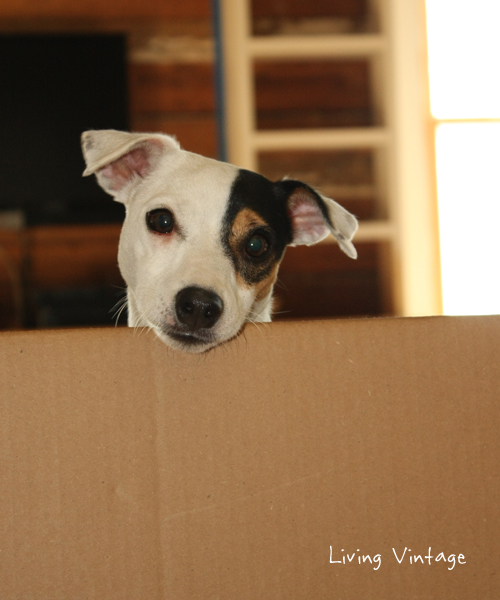
She whined a little and could have easily jumped over the cardboard, but seemed to know somehow that she needed to stay put.
After the drywall was completely removed, the guys tacked up tar paper to help prevent conditioned air from escaping through the walls on the closet/bathroom wall.
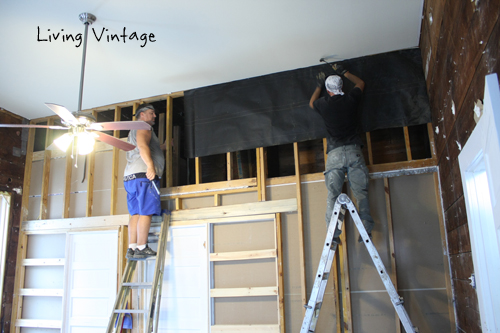

A prior owner had stuffed lots of batt insulation between the attic and dropped ceiling.

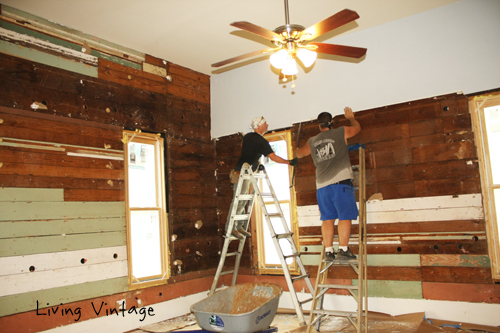
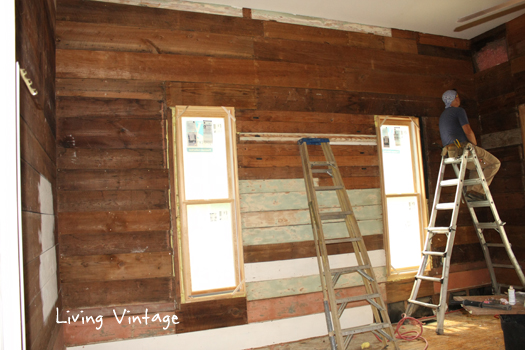
After that, the guys removed nails that still remained in the walls and replaced the hole-y boards.
One of the last boards to go was this particular board. It not only had holes, but had wire screen preventing the insulation from falling out. Effective, but ugly.
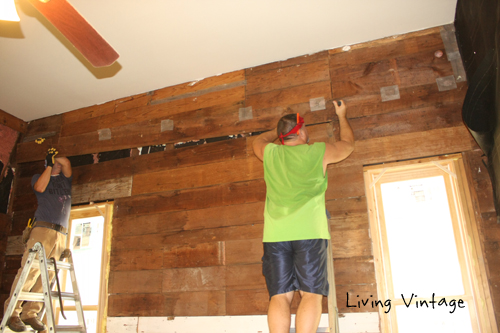
The (almost) finished walls looked a lot better, don’t you think?
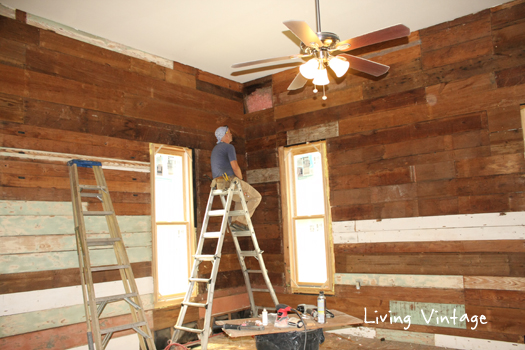
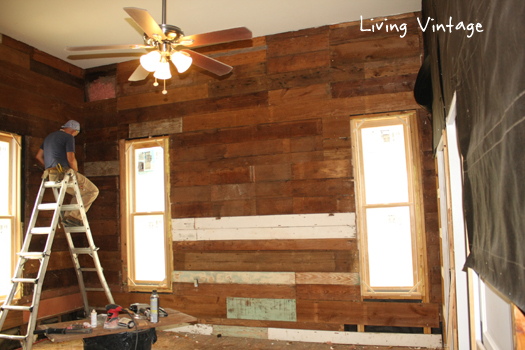
If you’re wondering where I was the whole time, I was out washing wood for the bathroom/closet wall.
As soon as it dried, the guys put it up.

I was also cleaning wood for a wood mosaic project I think you’re going to love. I’ll tell you about it next.
Until next time … !

Love the wide planking. You guys get a gold star!
I’ll take all the gold stars I can get!
Oh my, that looked like a huge undertaking! The wood plank walls already look so much better than the drywall. Looking forward to seeing the finished ‘after’ photos!
Thanks, Aria. I had to convince my husband to remove the drywall — he hates the dust and grime so much! — but it will be well worth it, I think.
Wow that was unusual. I just wrote an incredibly long comment but after I clicked submit my comment didn’t appear. Grrrr… well I’m not writing all that over again. Anyway, just wanted to say fantastic blog!
Well, I hate to hear that. I would have loved to have read it. But, I am super glad to hear that you like my blog!