• About
  • Contact
  • Parties
    • Bloglovin
    • Email
    • Facebook
    • Flickr
    • Pinterest
    • RSS
    • Tumblr
    • Twitter

Living Vintage

Blog. Salvage. Repurpose. Build. Collect and Share Vintage Ideas.

  • Home
  • Tour My Home
  • Popular Posts
You are here: Home / Create / A Patchwork of Reclaimed Tin

October 28, 2013 By Kim 16 Comments

A Patchwork of Reclaimed Tin

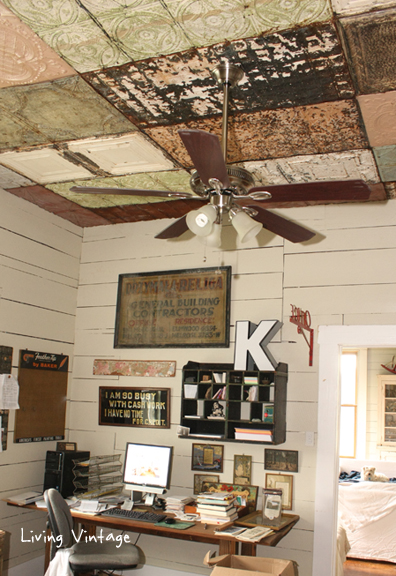
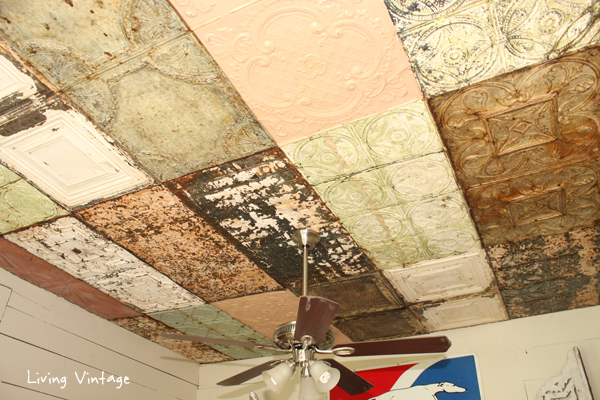
Just a quick post to show you how we finished the ceiling in our home office using the tins we cleaned and sealed a few weeks ago.

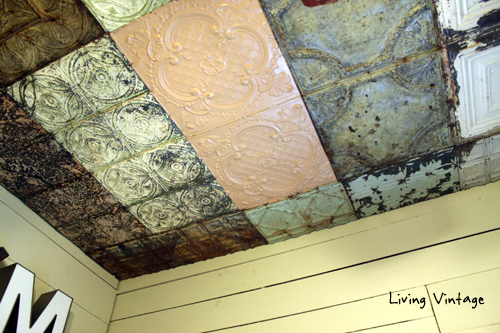
I took several shots when the ceiling was almost done lying flat on my back on the floor.  This one was the best of the bunch.

Our New Ceiling Using Reclaimed Tin - Living Vintage

You can tell the ceiling isn’t done because you can see a little bit of the wood ceiling underneath my logo.

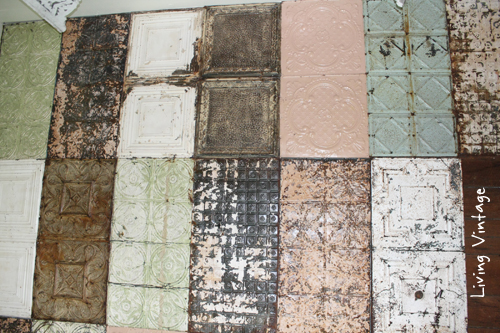
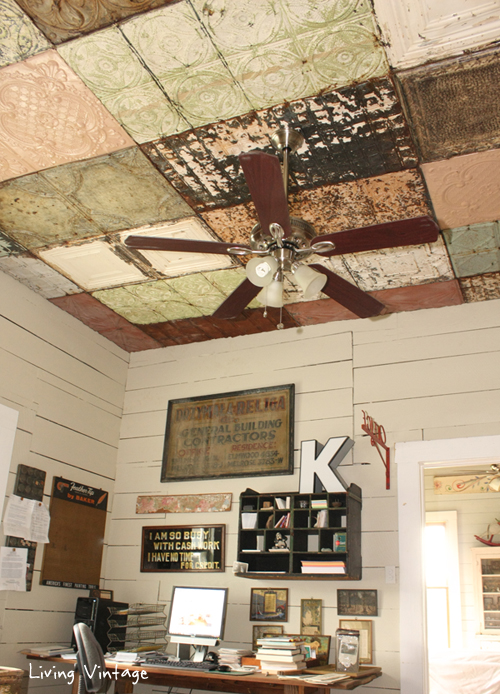
Here they are all finished and gorgeous.

Our New Ceiling Using Reclaimed Tin - Living Vintage

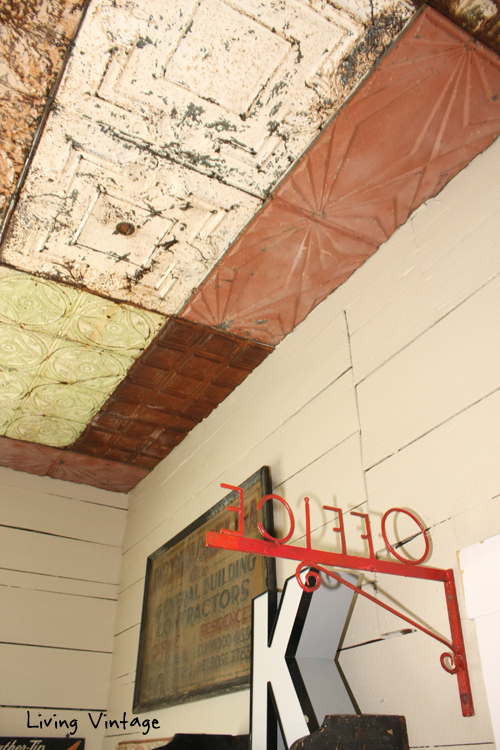
Oh, and the “K”?  That’s a recent Etsy purchase from the shop, Backroad Antiquities.

(Last time I looked, they had another “K” and other old letters available if you’re interested.)

Our New Ceiling Using Reclaimed Tin - Living Vintage

Well, I think they’re gorgeous.  What do you think?

Our New Ceiling Using Reclaimed Tin - Living Vintage

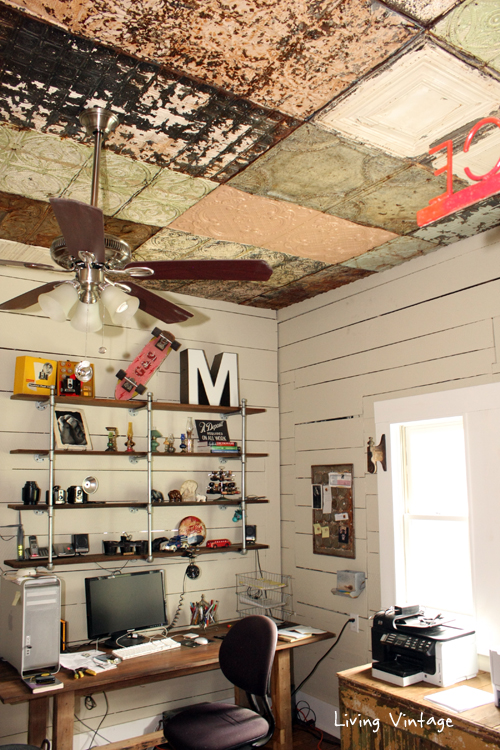
My only complaint is that you have to look up to see them (versus if we had installed them in a bedroom where we would see them all the time).

Our New Ceiling Using Reclaimed Tin - Living Vintage

Our New Ceiling Using Reclaimed Tin - Living Vintage

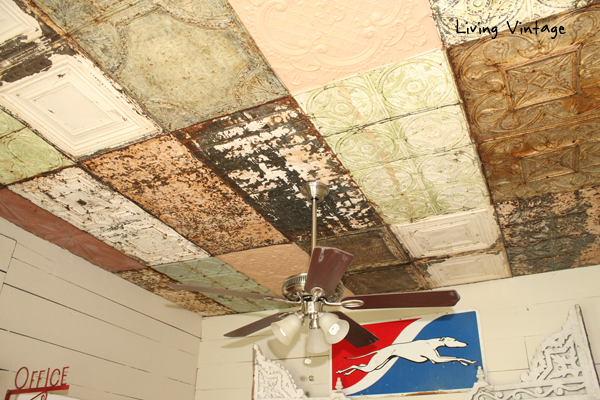
Still, I’m absolutely, positively thrilled with how they turned out.  I do love looking at them.

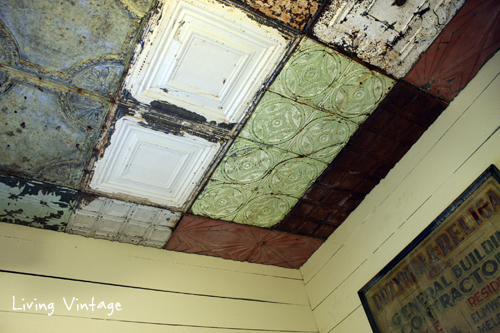
These last few shots show you how we finished the edges:  we just cut down several tins.

Our New Ceiling Using Reclaimed Tin - Living Vintage

Our New Ceiling Using Reclaimed Tin - Living Vintage

Our New Ceiling Using Reclaimed Tin - Living Vintage

Kim signature


Filed Under: Create, Popular Posts Tagged With: ceilings, home office, reclaimed tin, salvaged and repurposed

If you liked this post…

Subscribe and get a little vintage love in your inbox!

« A Quote for Today :: Affection
Reclaimed Beadboard for Sale »

Comments

  1. Cher says

    October 28, 2013 at 8:05 AM

    Yummy gorgeous!!!

    Reply
  2. Dawn says

    October 28, 2013 at 8:08 AM

    I love it!! I love your office too, all of the decor, the old stuff w/the new stuff 🙂

    Reply
  3. Gail says

    October 28, 2013 at 9:28 AM

    It’s amazing, I love everything you do in your house!

    Reply
  4. Stephanie Reeve says

    October 28, 2013 at 2:21 PM

    I am looking for some more old ceiling tin tiles. Do you have any more that you might sell?

    Reply
    • Kim says

      October 28, 2013 at 5:32 PM

      The ceiling tins we used were 2 x 4 tins, and unfortunately, we used every single one we bought. However, we do sell 2 x 2 ceiling tins made with old barn tin. I’ll shoot you an email with more information and photos.

      Reply
  5. Kelly says

    October 28, 2013 at 2:31 PM

    I think you are right they are gorgeous 😉

    Reply
  6. Teresa Atkinson says

    October 28, 2013 at 2:47 PM

    I love it – I want to do something like this in my laundry room

    Reply
    • Kim says

      October 28, 2013 at 5:33 PM

      You won’t be sorry!

      Reply
  7. Karen Baruth says

    October 29, 2013 at 10:17 PM

    This look awesome. It reminds me of Curious Sofa’s ceiling before she closed her store. Which was amazing, btw. Very nice job!

    Reply
  8. Svietka says

    November 1, 2013 at 10:01 AM

    OMG_and i thought i was ballsy…i m a conservative prude next to u guys. THIS IS AWESOME and makes me a bit green with envy-have i mentioned i think it is awesome

    Reply
  9. bottes ugg soldes says

    November 11, 2013 at 4:39 PM

    Awsome site! I am loving it!! Will come back again. I am taking your feeds also.

    Reply
  10. Revi says

    May 17, 2014 at 9:08 AM

    I LOVE this! Especially with your painted ship lap walls.It would make a lovely focal wall treatment, too…

    Reply
  11. Donna says

    June 28, 2015 at 10:27 AM

    I was interested in how you mounted them to the ceiling. Did you glue, nail or what mounting hardware worked best? Love the shading of the various tins, much more interesting than the same pattern throughout. Nice job!

    Reply
    • Kim says

      June 28, 2015 at 11:49 AM

      Donna, we nailed them to the ceiling with staples, using a pneumatic staple gun. I think we used 1/2″ to 5/8″ staples. Please note that we had wood ceilings to begin with. If you don’t have wood ceilings to start with, I would first nail up 1/4″ sheets of plywood or a perhaps a lathe structure. There are pros and cons for each method. Personally, I wouldn’t trust just glue and staples.

      Reply
  12. Nicole says

    August 1, 2017 at 8:37 PM

    What were the tin panels sealed with?

    Reply
    • Kim says

      August 2, 2017 at 6:52 AM

      I used clear polyurethane in a spray can.

      Reply

Leave a Reply Cancel reply

Your email address will not be published. Required fields are marked *

This site uses Akismet to reduce spam. Learn how your comment data is processed.

Press

About Me

Welcome to my blog! I'm Kim and I live and breathe vintage. My company deconstructs old houses, then we build new, "old" houses and renovate existing homes (including our own) using reclaimed materials. If you love salvage, repurposing, and vintage, then we hope you'll stay awhile and check us out.

Looking for Something?

Explore Blog Categories

Categories

Monthly Archive

Stay up to date

Join our newsletter to get all the latest

Copyright © 2025 · Divine theme by Restored 316

Copyright © 2025 ·Divine Theme · Genesis Framework by StudioPress · WordPress · Log in


Loading Comments...