• About
  • Contact
  • Parties
    • Bloglovin
    • Email
    • Facebook
    • Flickr
    • Pinterest
    • RSS
    • Tumblr
    • Twitter

Living Vintage

Blog. Salvage. Repurpose. Build. Collect and Share Vintage Ideas.

  • Home
  • Tour My Home
  • Popular Posts
You are here: Home / Create / Prepping Antique Ceiling Tin

October 2, 2013 By Kim 8 Comments

Prepping Antique Ceiling Tin

In addition to working on our master bedroom, and our big lumber sale, we carved out some time recently to prep our antique ceiling tins for our office ceiling.

I saw an antique tin, patchworked ceiling on Pinterest many months ago that I just loved.

via

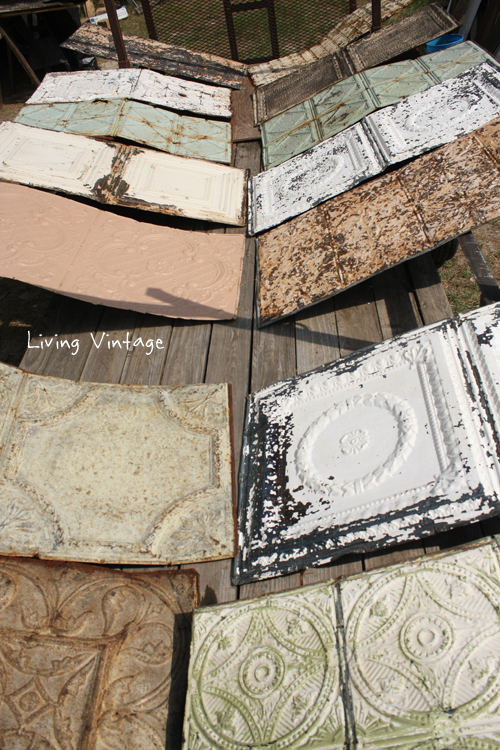
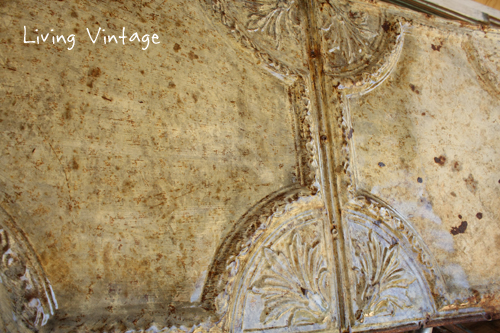
Over the past several months, we’ve bought ceiling tins where we can find them, mainly at antique shows and stores.  My mom and sister also had 5 ceiling tins that they were willing to part with.

We finally have enough for our home office ceiling.

Prepping Antique Ceiling Tin - Living Vintage

Prepping Antique Ceiling Tin - Living Vintage

Prepping Antique Ceiling Tin - Living Vintage

Prepping Antique Ceiling Tin - Living Vintage

Prepping Antique Ceiling Tin - Living Vintage

Prepping Antique Ceiling Tin - Living Vintage

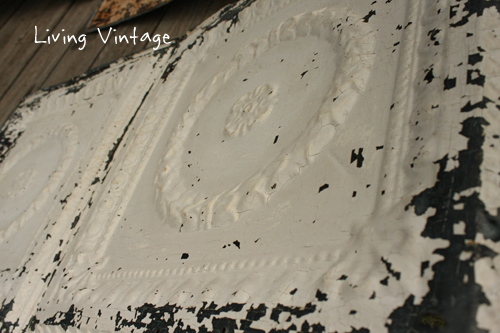
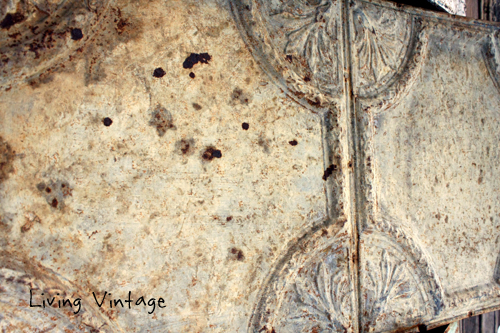
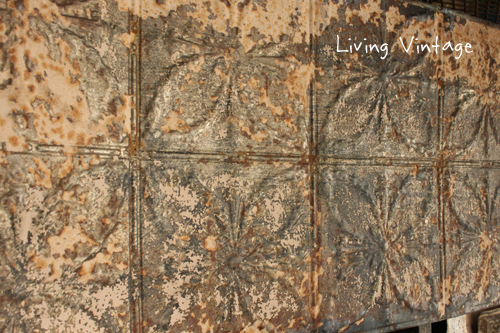
I think we have about four total of any one design.

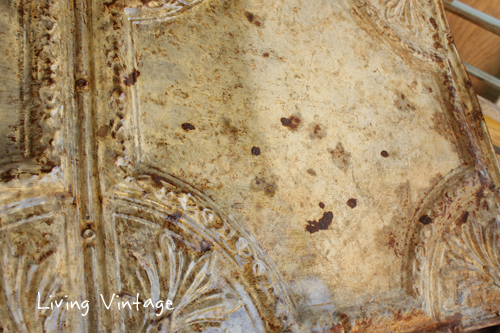
They were pretty grungy, so I cleaned them with dish soap, a little bleach and a nylon brush.

Prepping Antique Ceiling Tin - Living Vintage

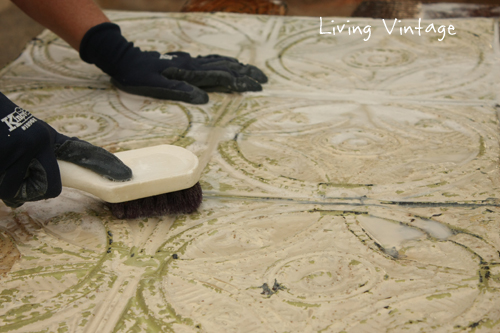
Then I laid them on our trailer and they baked in the sun for a few hours.

Prepping Antique Ceiling Tin - Living Vintage

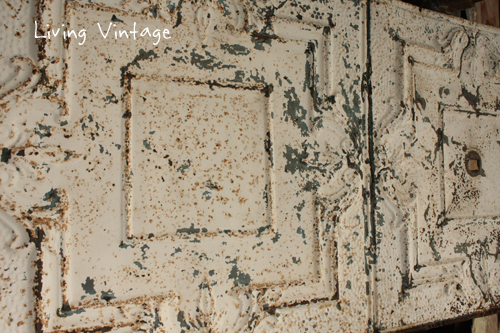
After they were totally dry, we sealed them with clear satin polyurethane specially formulated for metal.  The sealing helps to prevent any more paint from flaking off.

Prepping Antique Ceiling Tin - Living Vintage

Prepping Antique Ceiling Tin - Living Vintage

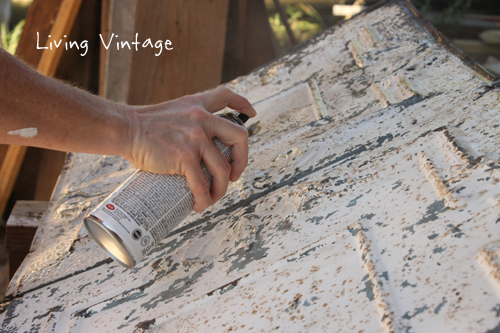
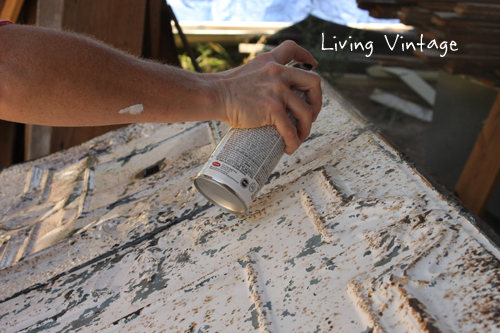
It also helps to amplify and deepen the colors a bit.

Prepping Antique Ceiling Tin - Living Vintage

This photo shows it relatively well.  The left side of the tin is wet with polyurethane.  The right side hasn’t been sprayed yet.

Prepping Antique Ceiling Tin - Living Vintage

The colors will dull some after the polyurethane dries.

We’re going to try to install them next week.  That’s the hope, anyway.

[Update to my original post:  We did install our tins and we love how it turned out.  You can see our finished ceiling here.]

Kim signature

Filed Under: Create, Popular Posts, Tutorials Tagged With: ceilings, reclaimed tin

If you liked this post…

Subscribe and get a little vintage love in your inbox!

« A Unique Way to Repair a Slipcover
Friday Favorites #3 »

Comments

  1. Kelly says

    October 2, 2013 at 9:53 AM

    Love it….. Can I move in LOL 🙂

    Reply
    • Kim says

      October 2, 2013 at 1:16 PM

      Sure. Why not? We could use the help. 🙂

      Reply
  2. Pam @ House of Hawthornes says

    October 2, 2013 at 3:01 PM

    I’m fascinated with this project. Can’t wait to see it finished. I always run across those tins around here, but always just one here, two there. NEVER thought to make something out of different styles of them. Great idea!

    Reply
    • Kim says

      October 2, 2013 at 3:44 PM

      It’s certainly been a fun part of the project: the hunt. How much do you find the tins for, Pam? Curious …

      Reply
  3. revi says

    May 16, 2014 at 1:07 PM

    LOVE this! Did you finish your ceiling yet?

    Reply
    • Kim says

      May 16, 2014 at 1:40 PM

      Yep, we sure did, and I love it. Here’s the link: https://www.livingvintageco.com/2013/10/new-ceiling-using-reclaimed-tin/.

      Kim

      Reply
  4. Jacki says

    July 9, 2022 at 3:27 PM

    I was really hoping to find the resulting ceiling, but the link in the post is broken. This link is not working; https://www.livingvintageco.com/2013/10/new-ceiling-using-reclaimed-tin/

    Reply
    • Kim says

      January 3, 2024 at 1:22 PM

      I’m sorry about that, Jacki! Here’s the link to the finished ceiling: https://www.livingvintageco.com/2013/10/new-ceiling-using-reclaimed-tin/. I loved it so!

      Reply

Leave a Reply Cancel reply

Your email address will not be published. Required fields are marked *

This site uses Akismet to reduce spam. Learn how your comment data is processed.

Press

About Me

Welcome to my blog! I'm Kim and I live and breathe vintage. My company deconstructs old houses, then we build new, "old" houses and renovate existing homes (including our own) using reclaimed materials. If you love salvage, repurposing, and vintage, then we hope you'll stay awhile and check us out.

Looking for Something?

Explore Blog Categories

Categories

Monthly Archive

Stay up to date

Join our newsletter to get all the latest

Copyright © 2025 · Divine theme by Restored 316

Copyright © 2025 ·Divine Theme · Genesis Framework by StudioPress · WordPress · Log in


Loading Comments...